Welcome to the ELLI help center! Here you will find information on what Sui is, how it works, and how to use it.
What is Sui?
Sui is a permissionless Layer 1 blockchain that is designed to enable creators and developers to build experiences for the next billion users in web3. It is horizontally scalable, which means it can support a wide range of application development with unrivaled speed and low cost.
Scalability and low-latency
Sui allows for greater scalability and low latency which makes it suitable for straightforward applications. Transactions with Sui can be carried out in parallel, thereby maximizing the use of processing power and allowing for increased throughput with the addition of more resources.
Here are some examples of real-life applications where you could benefit from Sui’s scalability and low-latency features:
- Gaming: Online gaming requires high-speed data processing and low latency to ensure seamless gameplay. Scalability allows for more players to join the game, without compromising performance or your user experience.
- NFT Marketplaces: Non-fungible tokens (NFTs) have seen a surge in popularity, with high-value sales in the millions of dollars. NFT marketplaces require high scalability to accommodate a large number of users and low latency to ensure smooth transactions, especially during peak periods.
- Financial services: Scalability and low latency are critical features in the financial services industry, especially for high-frequency trading and payment processing. Sui can be used to develop blockchain-based payment systems, trading platforms, and other financial services that require fast, secure, and scalable transactions.
Overall, Sui's scalability and low-latency features can benefit a wide range of applications, from gaming and NFT to finance. These features allow for faster, more efficient, and more secure transactions, enabling web3 applications to provide better services to you as the end user.
Sui tokens and validators
The Sui blockchain has a native token called SUI, with a fixed supply (ten billion tokens).
The SUI token has four main functions: staking, gas fees, a versatile asset, and voting rights. One of the primary benefits of holding SUI tokens for you is the ability to stake them to earn an annual yield. Staking is the process of delegating tokens to a validator (while keeping full control over your tokens) to support the network's operation and receive rewards in return.
At the conclusion of the epoch, fees earned through all transactions handled are allocated to validators based on their involvement in running the system. Validators then give a portion of the fees as incentives to you as a user who delegated stakes to them. Furthermore, SUI acts as a liquid asset for various applications, including the basic features of money.
You can use their SUI tokens as collateral in various DeFi protocols. For example, you can deposit your SUI tokens in liquidity pools and earn fees from providing liquidity to different trading pairs. You can also lend or borrow their SUI tokens in lending markets and earn interest. By using SUI tokens as collateral, you can also access other DeFi services and products that require collateralization, such as derivatives, synthetic assets, insurance, etc. To use your SUI tokens as collateral, you need to connect your wallet to the DeFi protocol you want to interact with. You can then approve the transfer of your SUI tokens to the protocol's smart contract and follow the instructions on the protocol's interface.
⚠️Please note: We would like to remind you of the importance of exercising caution and conducting thorough research before connecting your ELLI wallet to different DeFi applications.
Please take the time to research the project thoroughly. Check the reputation of the project team, the security measures in place, and any past security incidents or red flags. Always read the permissions carefully and only grant access to what is necessary.
SUI token holders have the right to participate in the governance of the SUI blockchain. Governance allows token holders to propose and vote on changes to the platform, including upgrades, changes to fees, and more. By holding SUI tokens, you have a say in the direction of the protocol and can influence its development. Lastly, the SUI token is also needed to pay the gas fees when executing and storing transactions or other operations, for more details about gas fees, gas price and gas limit you can consult this article.
Transactions in Sui
A transaction in Sui is a way to make changes to the blockchain, which is like a digital ledger that keeps track of all the transactions made on the network. Think of it as a digital record book that shows who owns what and when they acquired it.
When you make a transaction in Sui, you might be doing something simple like transferring a coin from your wallet to a friend's wallet, or you might be minting a new NFT. Whatever the transaction is, you'll need to pay for the cost of processing it. This is where the gas comes in.
Gas is like a fee that you pay to make sure your transaction is processed by the network. It's a way to make sure that people don't abuse the system by making lots of transactions that don't actually do anything also known as denial-of-service attacks, with the purpose of overloading the network. You can think of it as paying a small fee to use a toll road or a parking meter.
We hope this information has been helpful in understanding Sui. For more information or help using ELLI, please see our documentation or reach out to our support team.
Sui's Gas Pricing Mechanism: Delivering Low, Predictable Fees
Sui's gas pricing mechanism is a unique approach that delivers low, predictable transaction fees for users. In this article, we'll explore how this mechanism works and how it benefits you as a Sui user.
Dynamic gas
A dynamic gas price blockchain, like SUI, adjusts the cost of transactions based on how much computing and storage resources are needed to process them. This means that the gas price can change depending on how busy the network is, how complex the transaction is, and how much data needs to be stored.
Low, Predictable Fees for Users
With Sui's gas pricing mechanism, you can focus on using the Sui network without worrying about having to forecast the current market price of gas fees. Validators agree on a network-wide reference price at the start of each epoch, and you as a Sui user can use the reference price as a credible anchor when submitting your transactions. This makes it easy for you to estimate the cost of transactions and avoid unexpected fees.
Preventing Denial of Service Attacks
Sui's gas pricing mechanism also prevents denial of service attacks, often referred as DoS attacks, which can overload a network and disrupt its normal operation. By requiring fees for both transaction execution and data storage, Sui ensures that users are responsible for the resources they consume. This helps prevent malicious actors from flooding the network with low-value transactions or data. For you as an SUI user, this guarantees a stable and always functional network.
Gas Fees Calculation Formula
The gas fees associated with an arbitrary transaction "T" equal:
Gas Fees[T] = ComputationUnits[T] × Computation Price[T] + Storage Units[T] × StoragePrice
Let’s break this down a bit for more clarity.
In Sui's blockchain network, when you want to perform a transaction, you have to pay a certain amount of SUI tokens. This payment is called a "gas fee." The gas fee is determined by how much work is needed to do what you want to do, like sending a token, minting an NFT, or performing a swap.
Think of it like a game where you have to pay for each move you make. Some moves are easy and don't cost much, like moving one step forward. But other moves are harder and cost more, like jumping over a big obstacle.
In Sui's blockchain, the gas fee is made up of two things: computation and storage.
Computation is like how much thinking and work the computer has to do to process your request. Storage is like how much space your information takes up on the computer's memory.
The cost of each computation and storage is measured in units, and each unit costs a certain amount of SUI tokens. When you want to do something, you tell the computer how much you're willing to pay for each unit of computation you need.
For example, if you want to send an NFT, you might say "I'm willing to pay 1 SUI token for every 10 units of computation." The computer then figures out how much it will cost to process your request based on how many units of computation and storage you need and how much you're willing to pay for each unit. You can set the price of computation when submitting a transaction, while the price of storage is fixed and set by governance proposals.
In conclusion, by using the ELLI wallet on the SUI blockchain, the key takeaway is that you can expect low and predictable transaction fees, faster transaction processing times, and a more reliable and efficient blockchain overall.
Sound’s great, doesn’t it?
How to export my ELLI wallet recovery phrase or private key
ELLI is a “user custodial wallet”. This means that no one controls your accounts except for you (or anyone else who gets ahold of your Recovery Phrase or private keys). Since we do not hold your private keys on a server that we maintain, or for that matter, at all, we are unable to recover them for you. If you are logged into your ELLI wallet on any device you can export your recovery phrase or the private key from there.
Recovery Phrase:
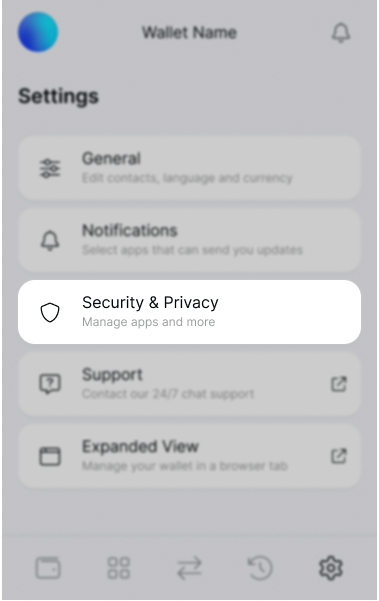
Access your wallet
- Click on the Settings icon (⚙️)
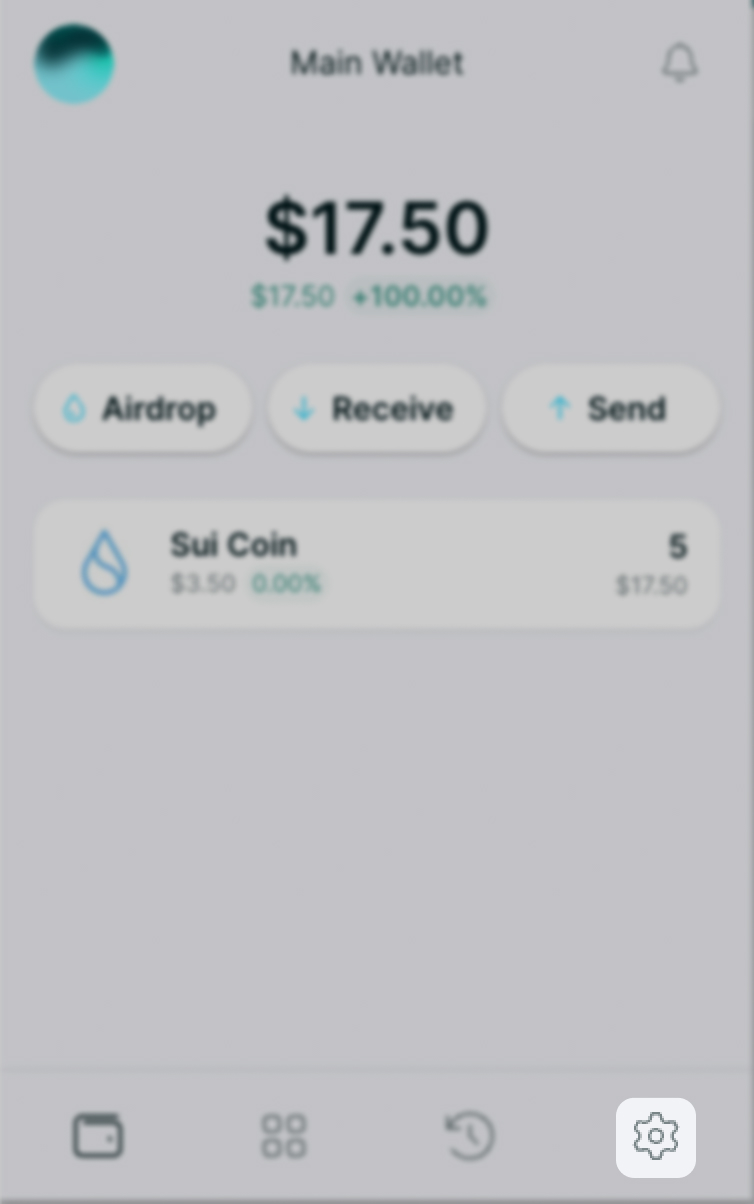
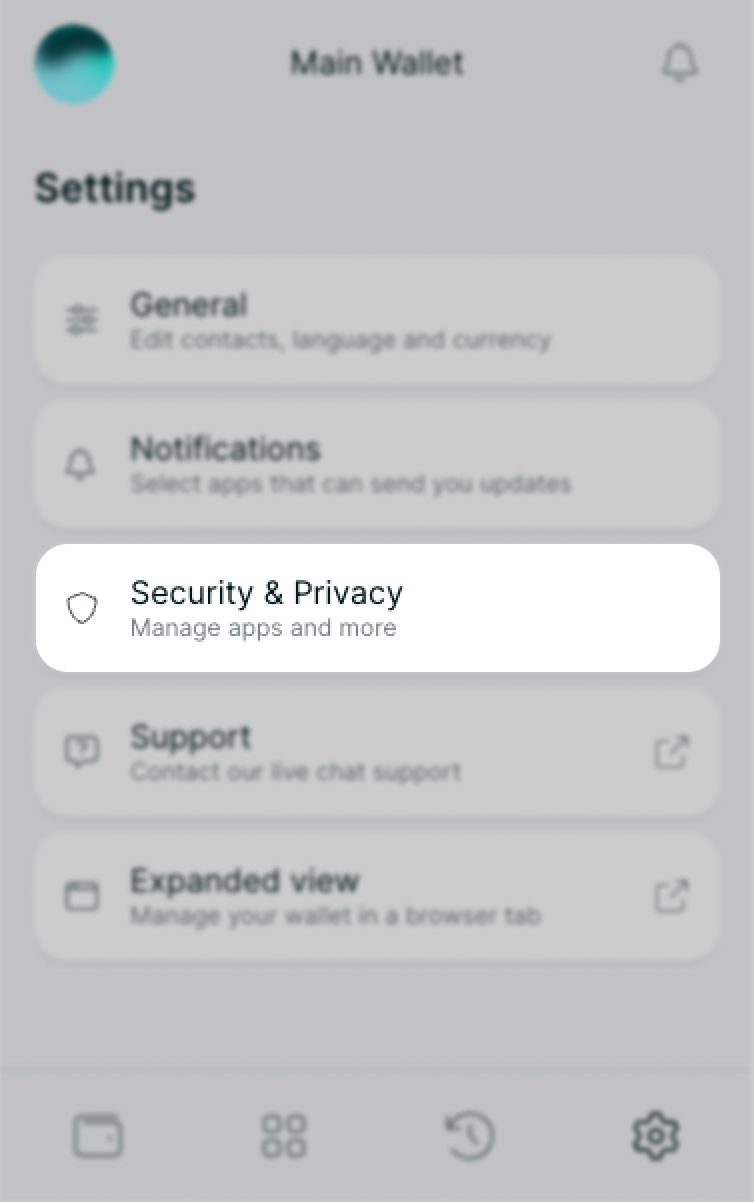
- Choose Security and Privacy.
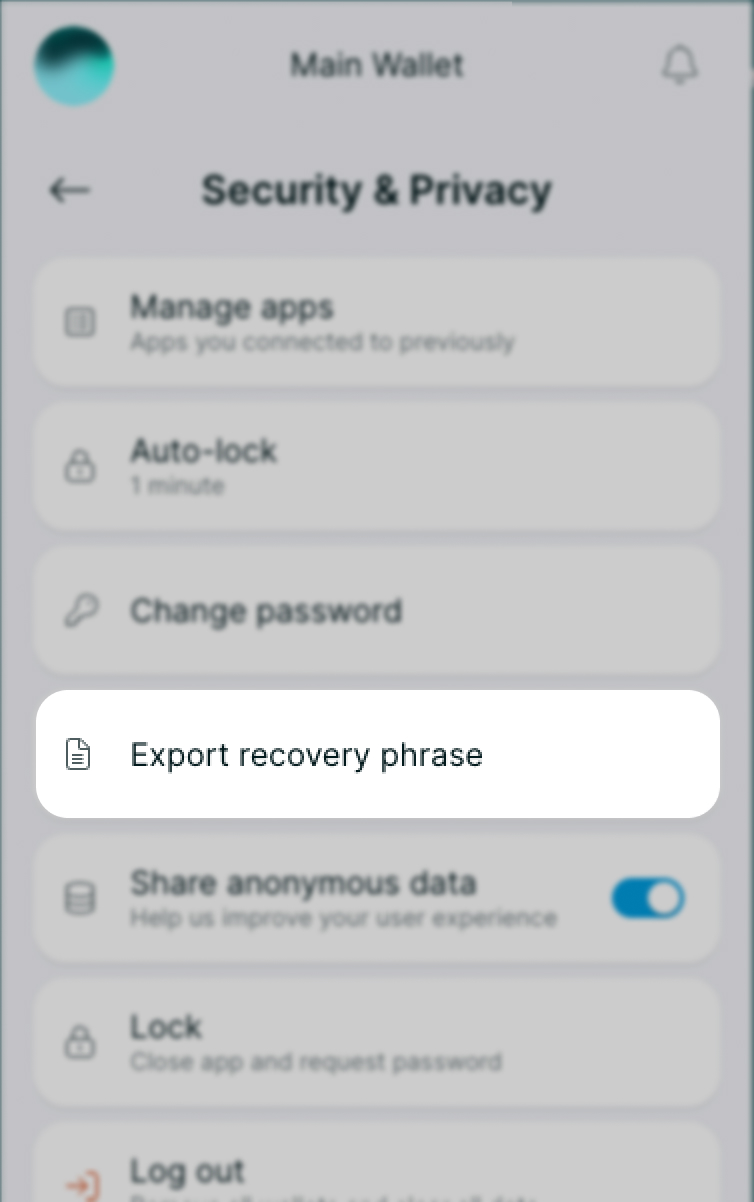
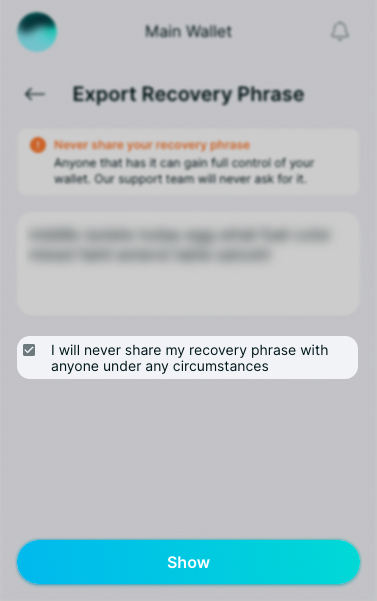
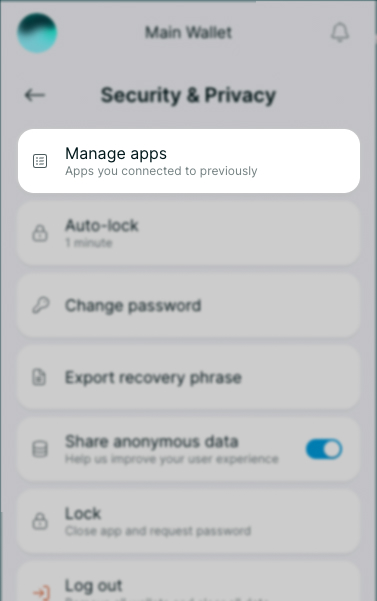
- Select Export Recovery Phrase
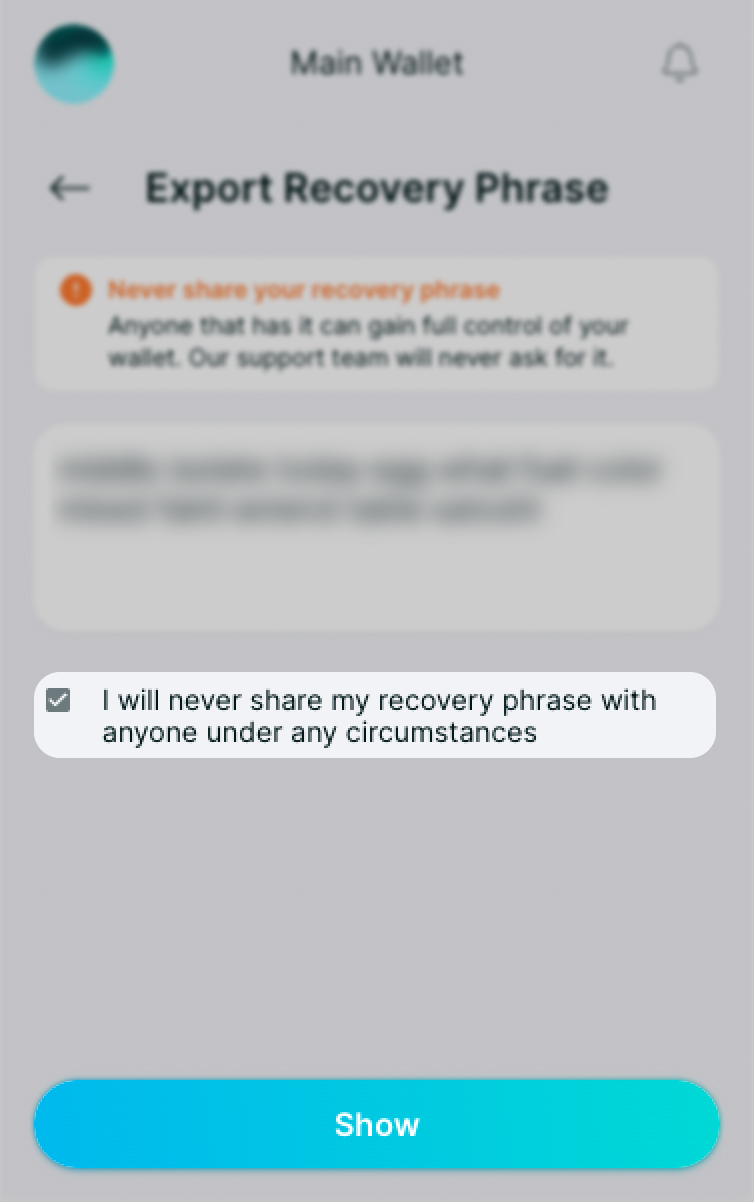
- Click on Show and your Recovery Phrase will show in the middle text box.
Private key:
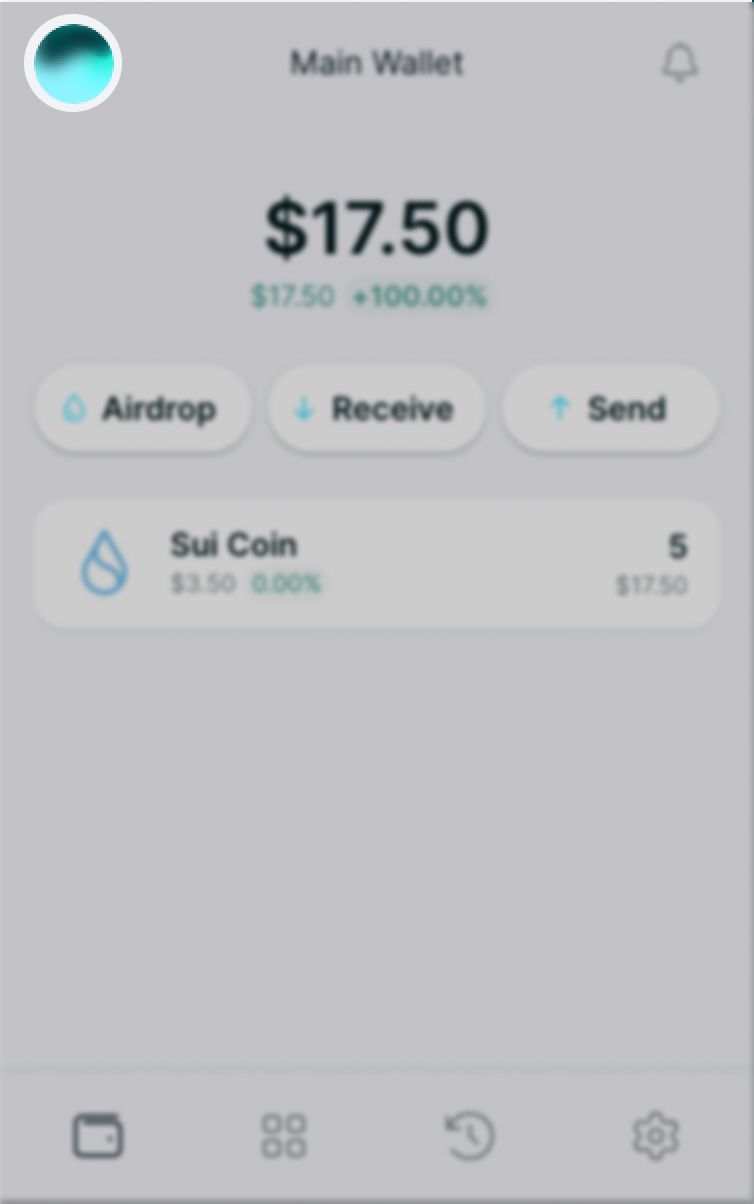
Access your wallet
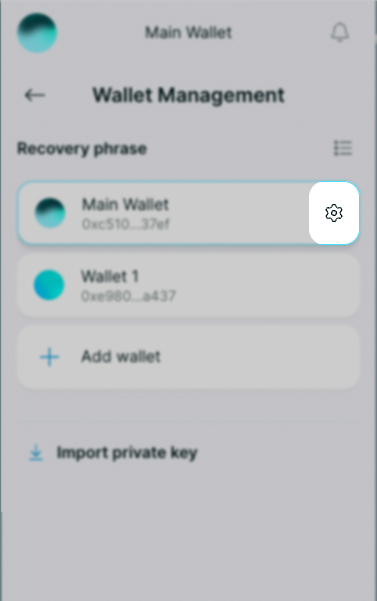
- Click on the account switcher icon (PFP)
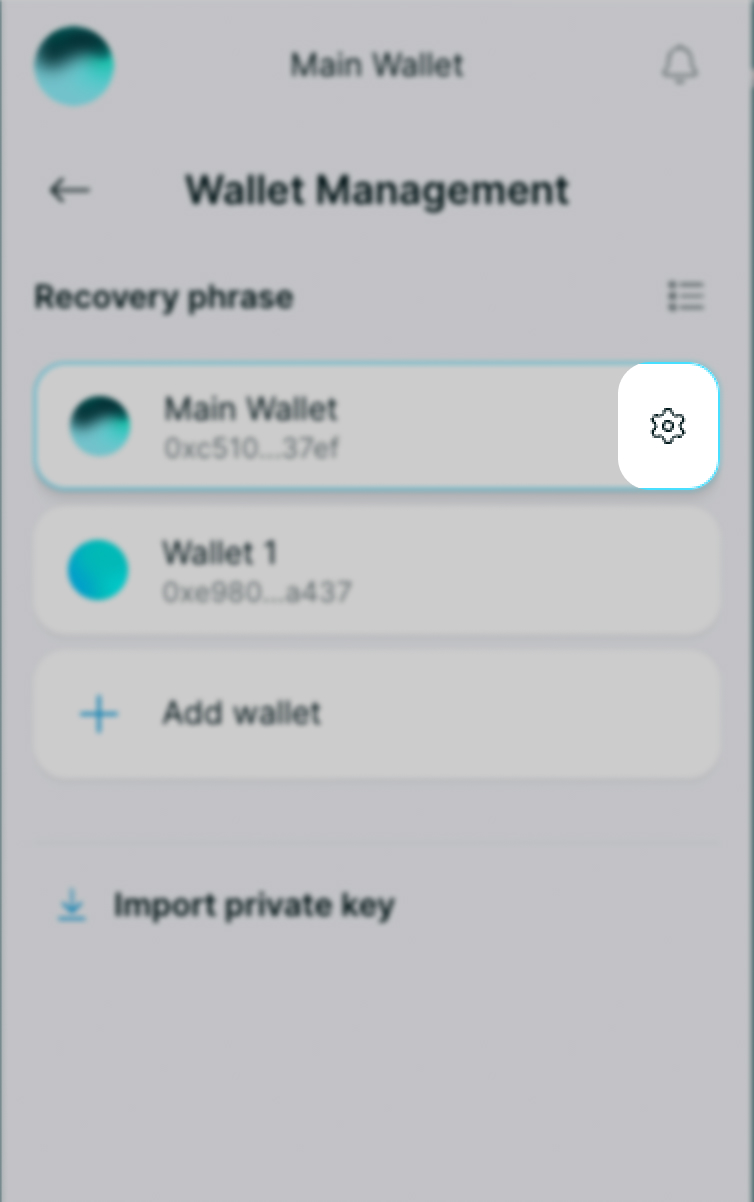
- Hover over the desired account with your mouse and click on the Settings icon (⚙️)
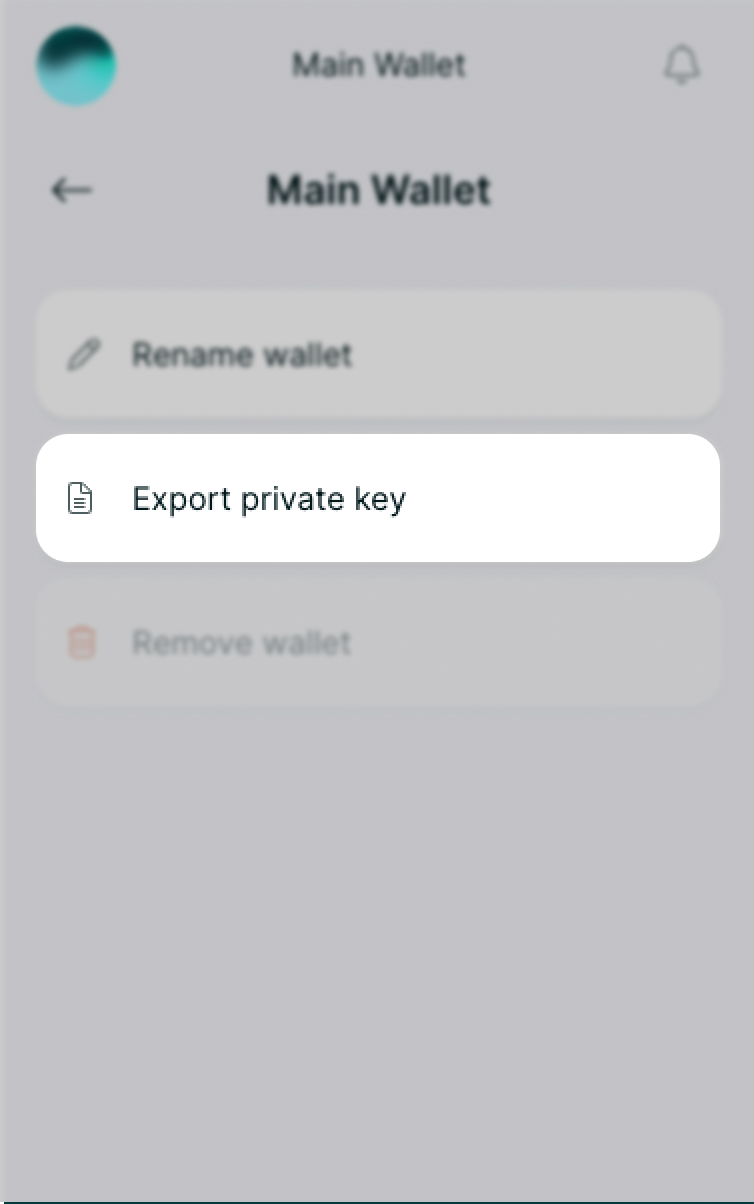
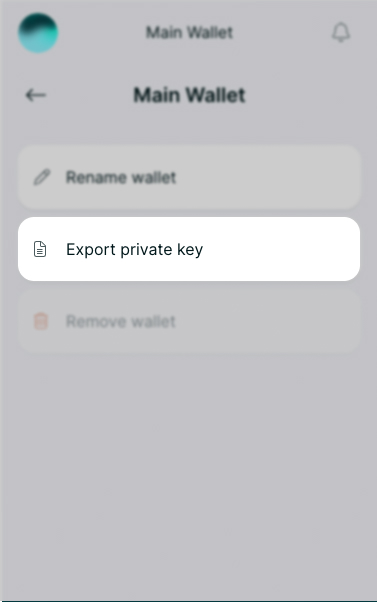
- Then select the option Export Private Key.
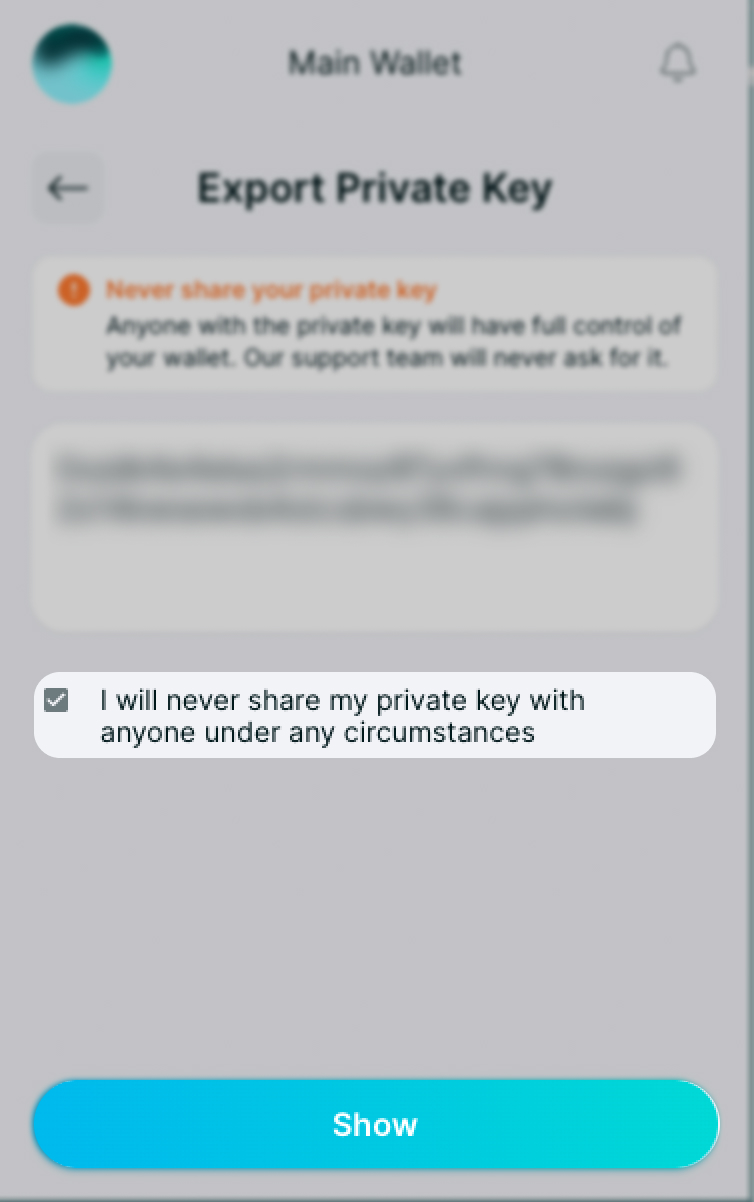
- Click on Show and your private key will show in the middle text box.
Note:
Although a Recovery Phrase can access multiple wallets, it is done so by accessing the private keys of these wallets. So when you export a private key, it is only for the current account that you are logged into.⚠️Do NOT store this on your device (doc, jpg, screenshot).
Write it down on a piece of paper and store it in a safe place! ⚠️
How to Check Transaction Activity Within Your ELLI Wallet
Your transaction activity keeps records of all transactions you have performed with your wallet. In simple terms, it’s like checking your app history to see all past actions. This data gives you insight into what you have been doing, which enables you to gain awareness of your preferences and wallet usage.
Checking your transaction activity takes only a couple of clicks. Let’s do a step-by-step walkthrough and see how it’s done.
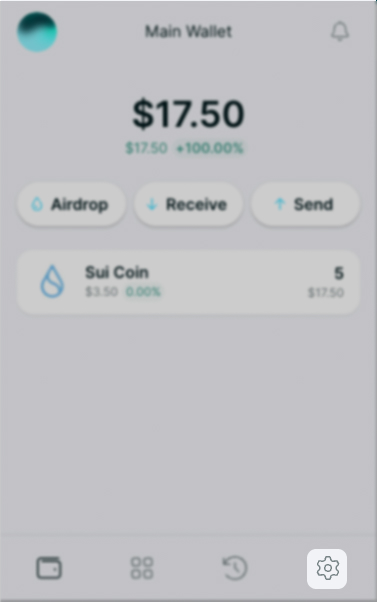
Step 1
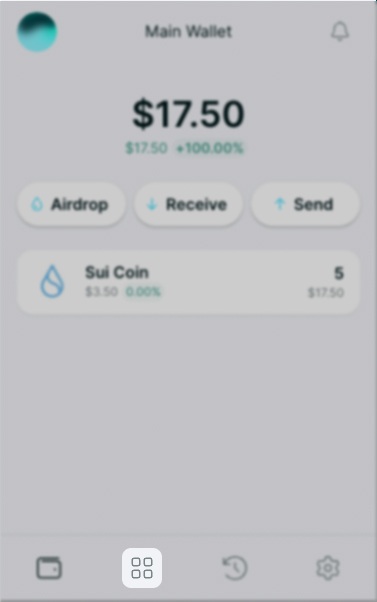
Access your Portfolio screen.
At the bottom of the screen you will notice several icons for different features (from left to right): 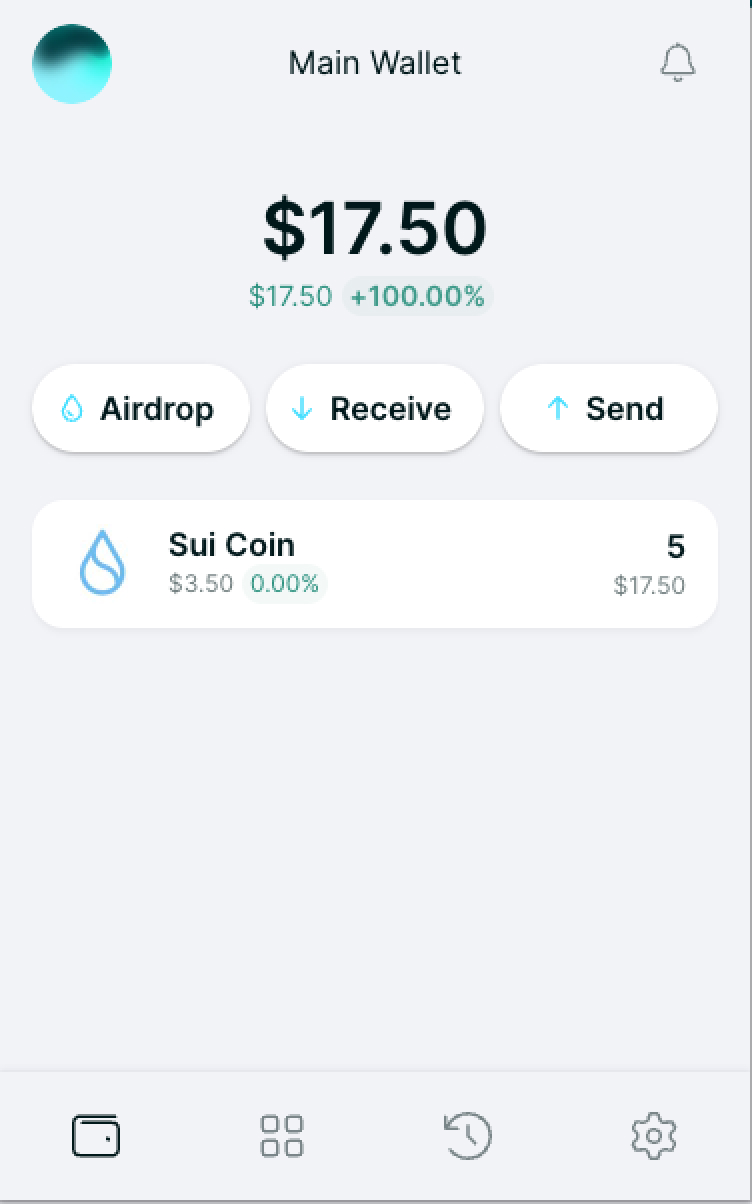
- Portfolio
- NFT Gallery
- Activity
- Settings
Step 2
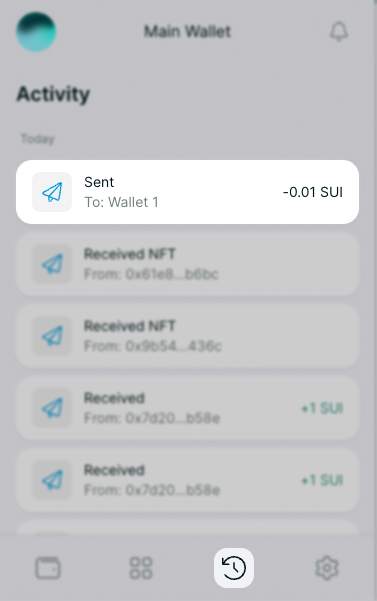
Click on the fourth icon from the left side to go to your Activity screen.
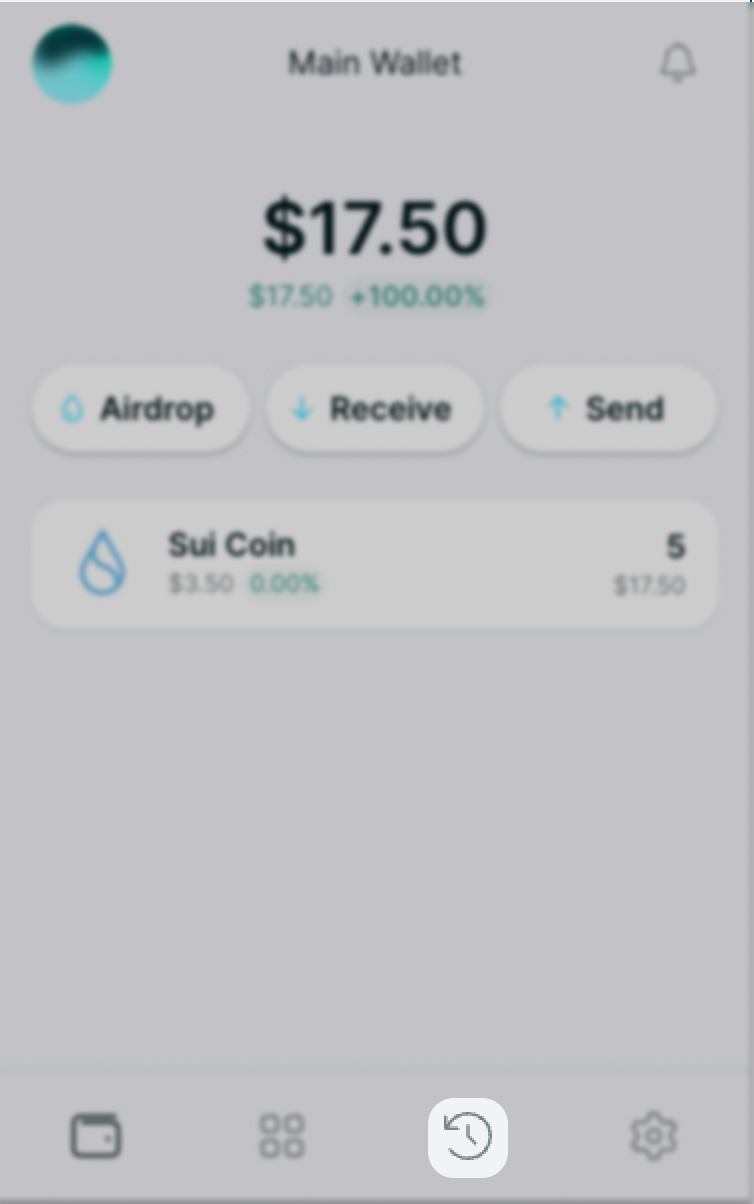
That’s it! Now you can see your activity log showing you the history of your ELLI transactions.
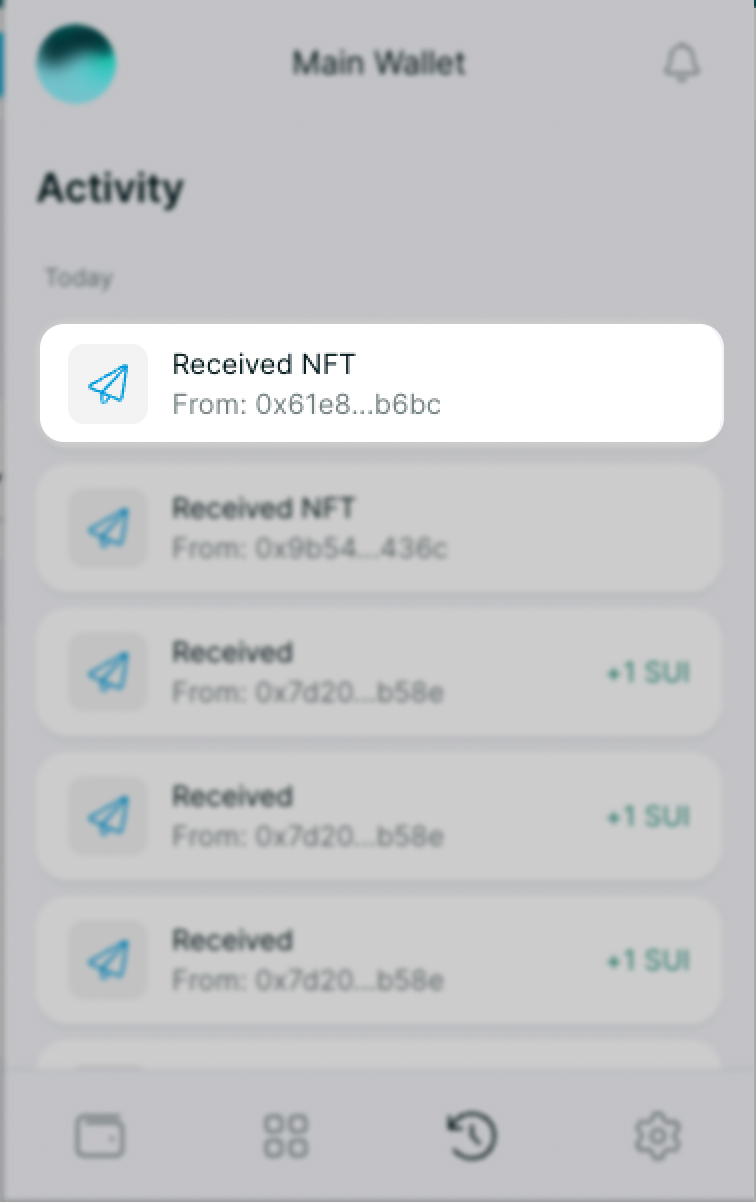
We want to point out that the image above is used as an example and shows a newly created wallet with initial activity only. Once you start using your ELLI Wallet, all of your transactions will be shown in your Activity log.
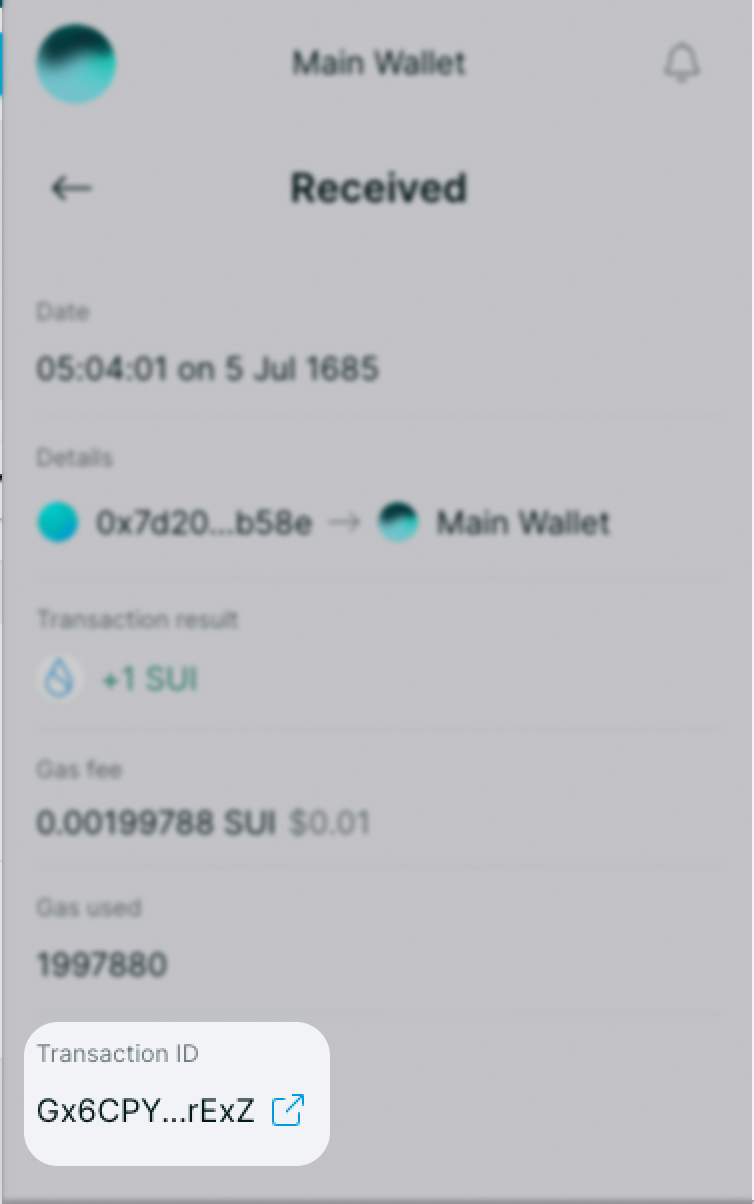
From your Activity log, you can easily check your transaction in the blockchain explorer by selecting the desired transaction from the list and on the next screen clicking on View in explorer
How to install the ELLI Wallet browser extension for Chrome
Installing the ELLI Wallet extension is not complicated at all. It is a simple process that will only take you a couple of clicks and minutes. We’re going to show you how to do it, step by step.
Installing the ELLI Wallet Chrome browser extension
Step 1
Go to the official ELLI Wallet website: https://elliwallet.com/
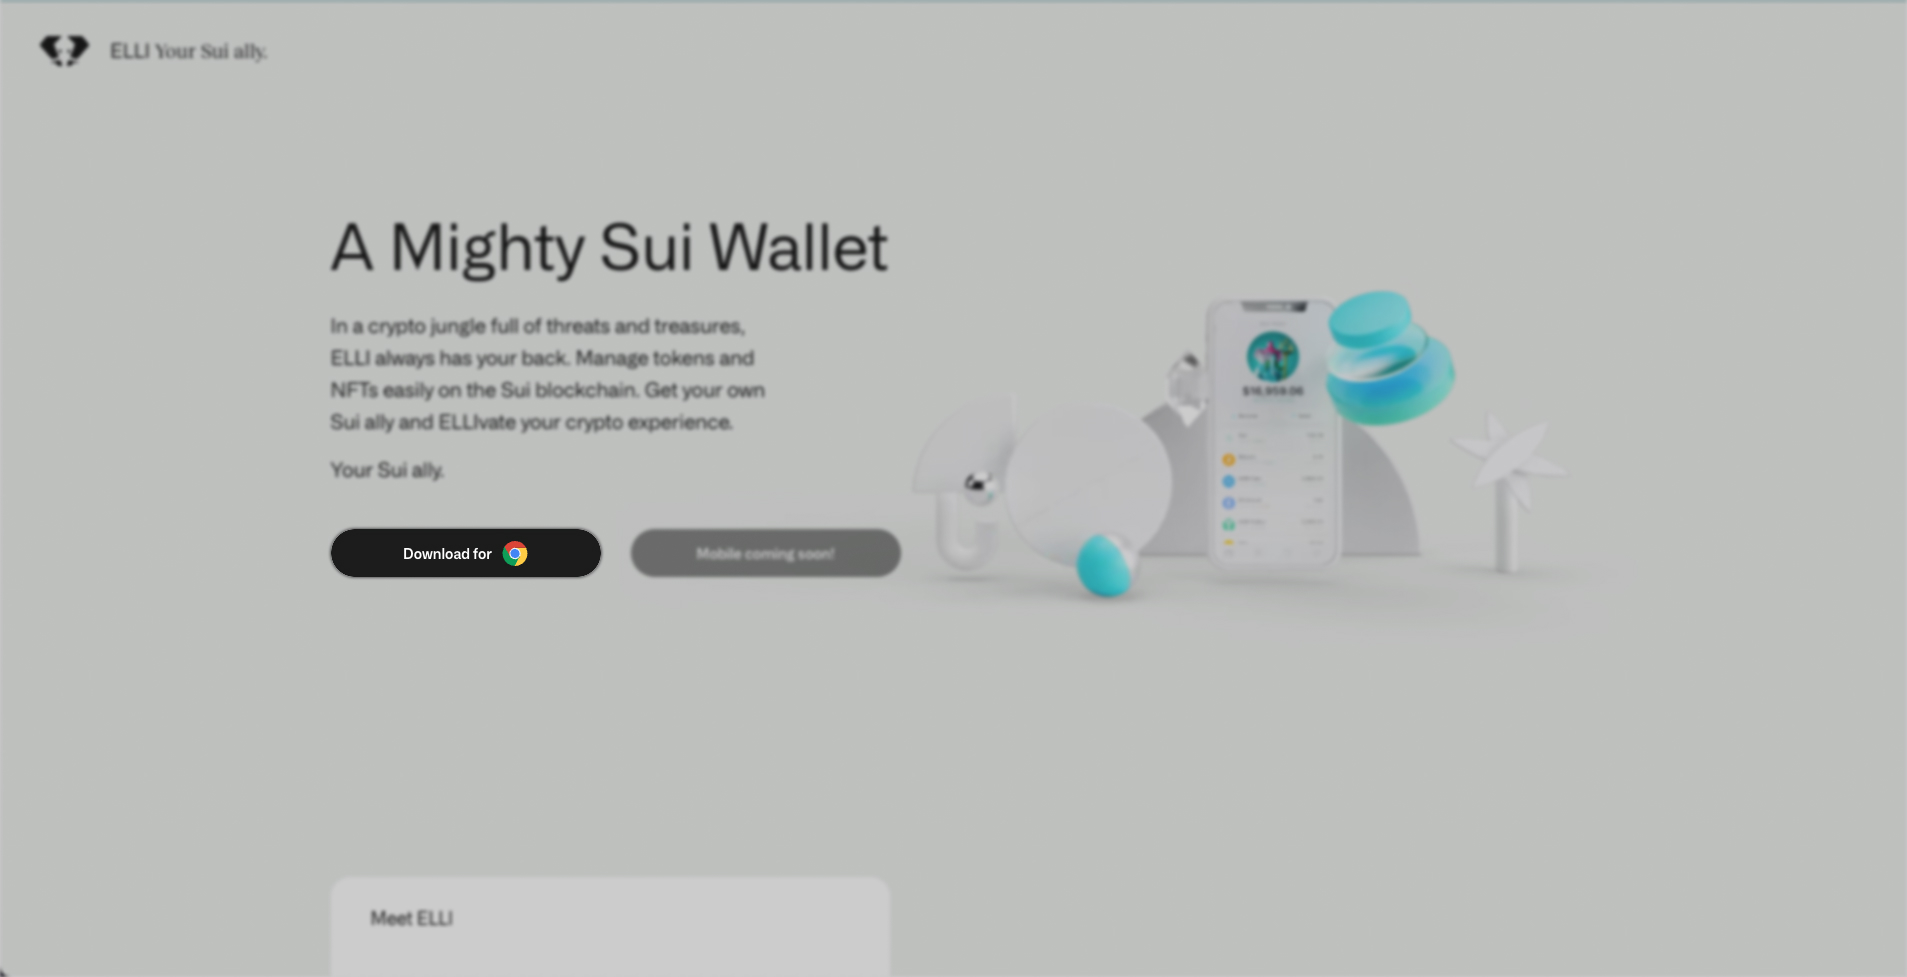
When there, you will see a button that says “Download for” followed by the Chrome icon. After clicking, you will be redirected to the ELLI Wallet page at the Chrome Web Store.
Step 2
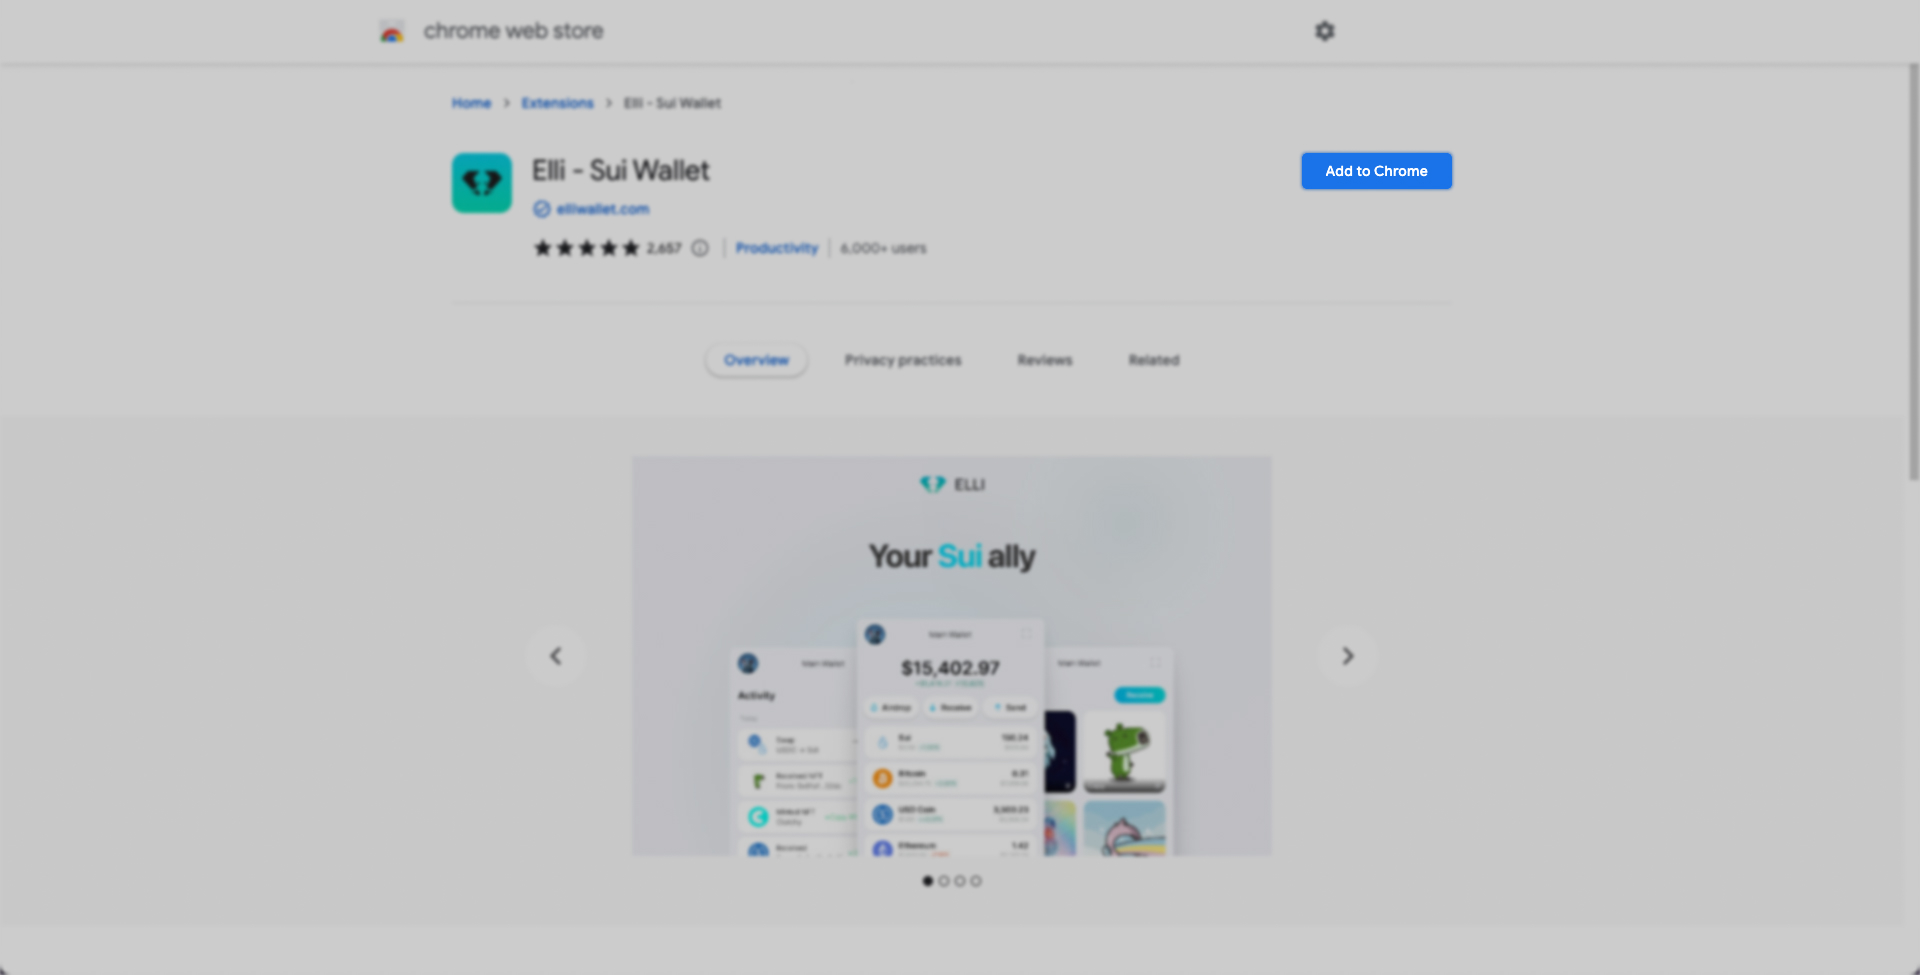
At the Chrome Web Store ELLI Wallet page, you will see a button that says “Add to Chrome” near the top right corner. Click on that button to install ELLI for Chrome.
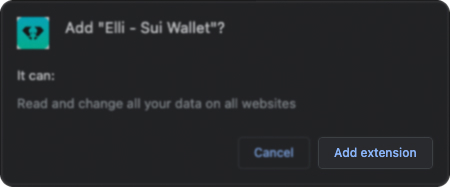
A pop-up message will appear, asking you to confirm adding the ELLI Wallet Extension to Chrome.
Click on the “Add Extension” button. The installation process is automatic and takes only a couple of seconds.
Step 3
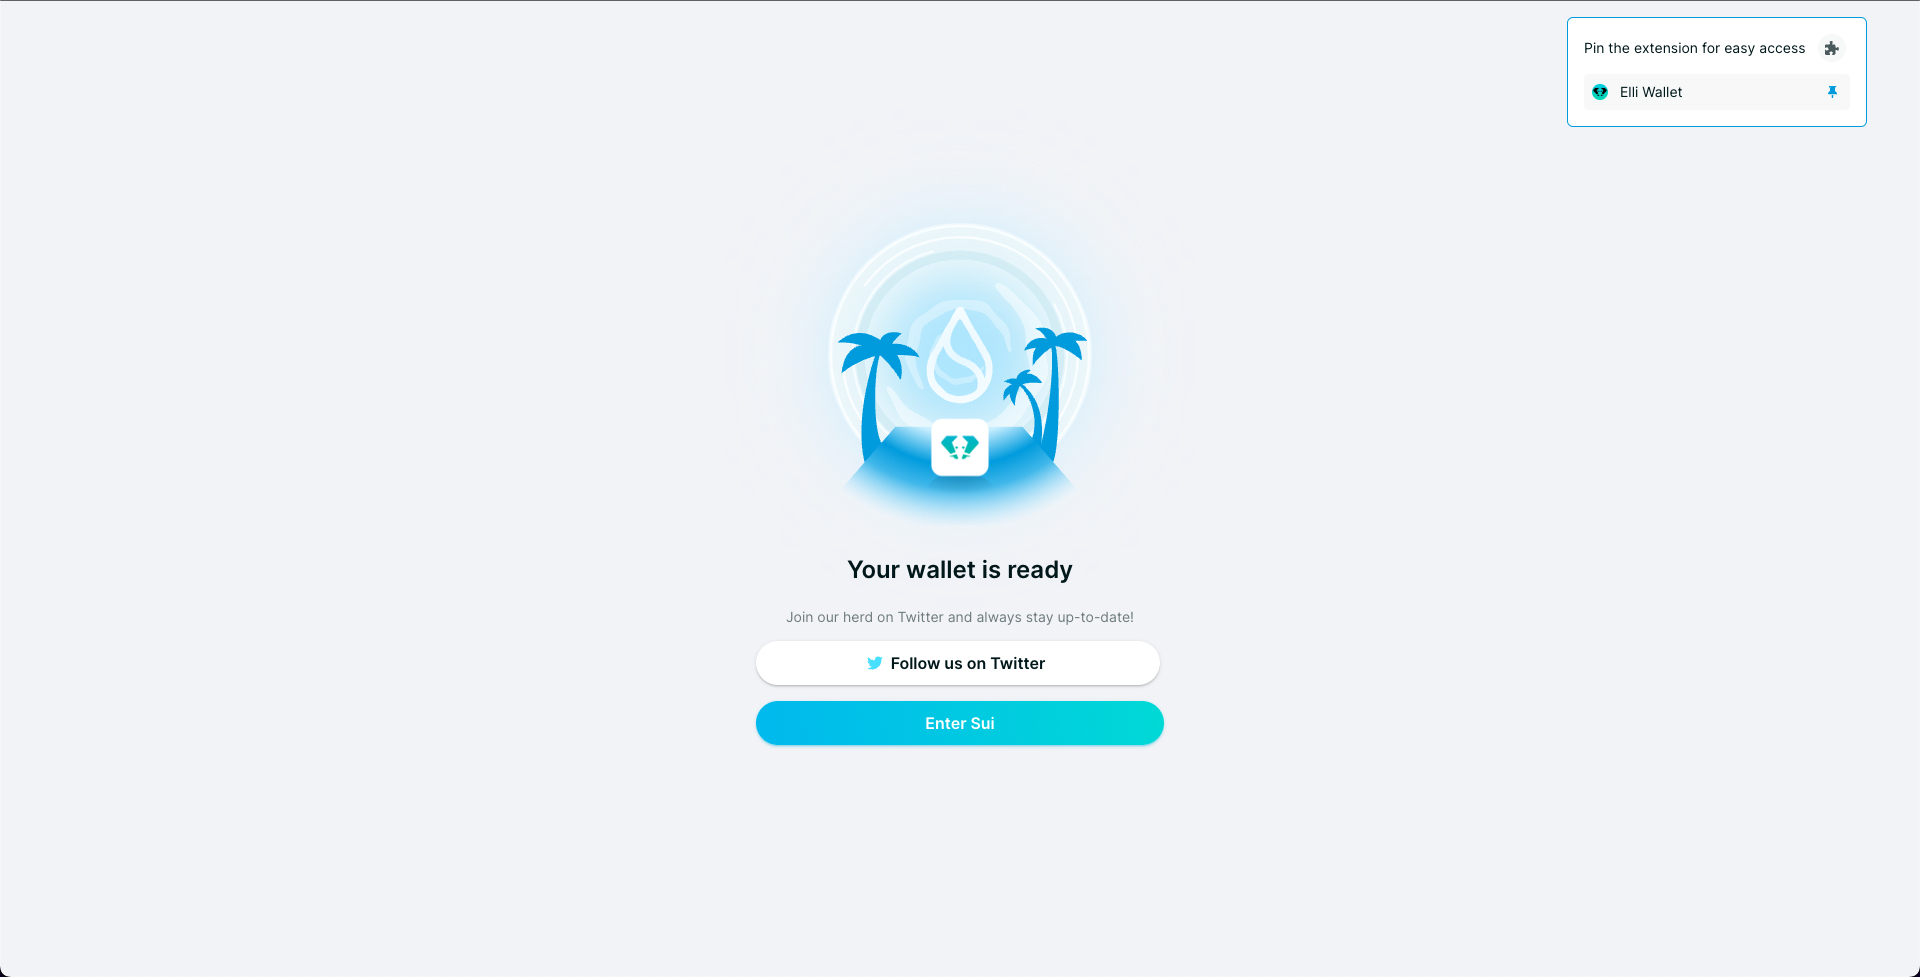
After you have completed the installation process, your ELLI Wallet will be available among other extensions for your Chrome Browser.
To access your ELLI Wallet Chrome extension, click on the Extension button located at the top right corner of the navigation bar in Chrome. The Extension button is shaped like a puzzle piece.
Once you have clicked that button, a dropdown menu will appear with the ELLI Wallet.
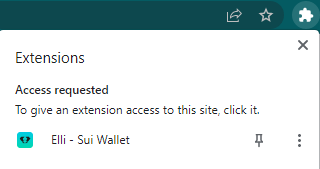
In the dropdown menu, click on the ELLI Wallet icon.
A new tab will open, prompting you to use your Chrome ELLI Wallet Extension for the first time.
Step 4
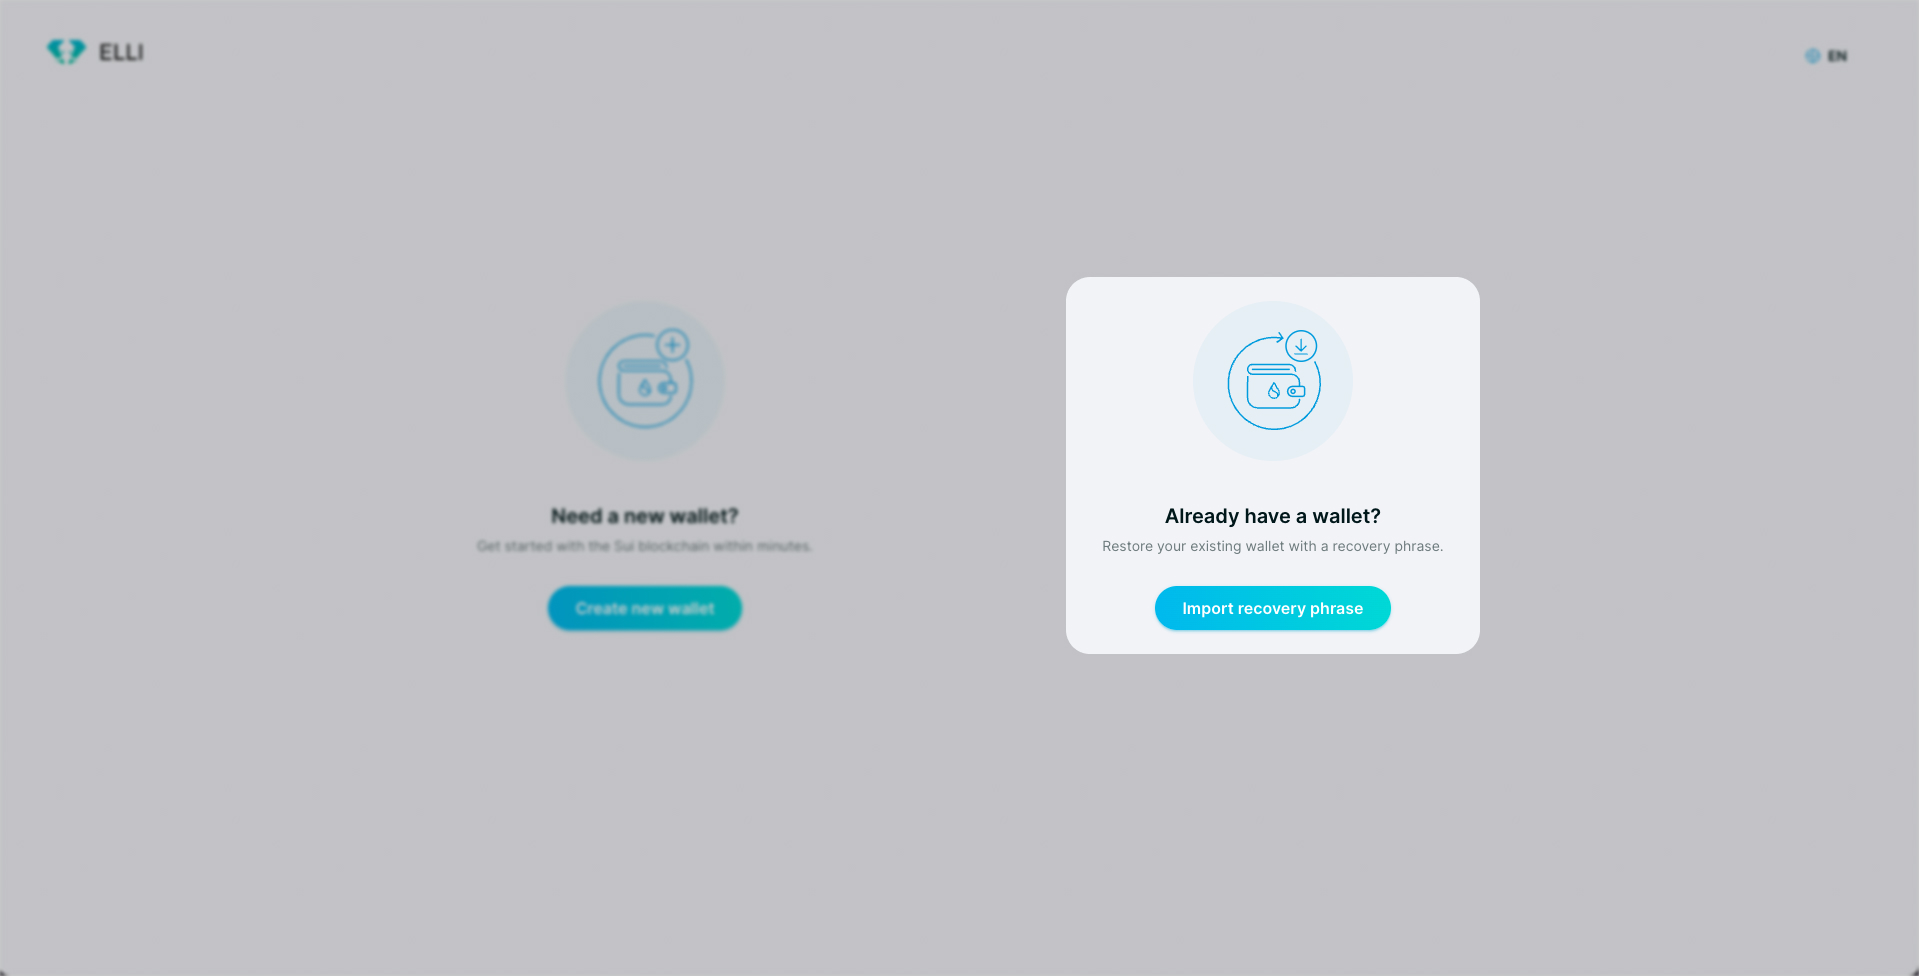
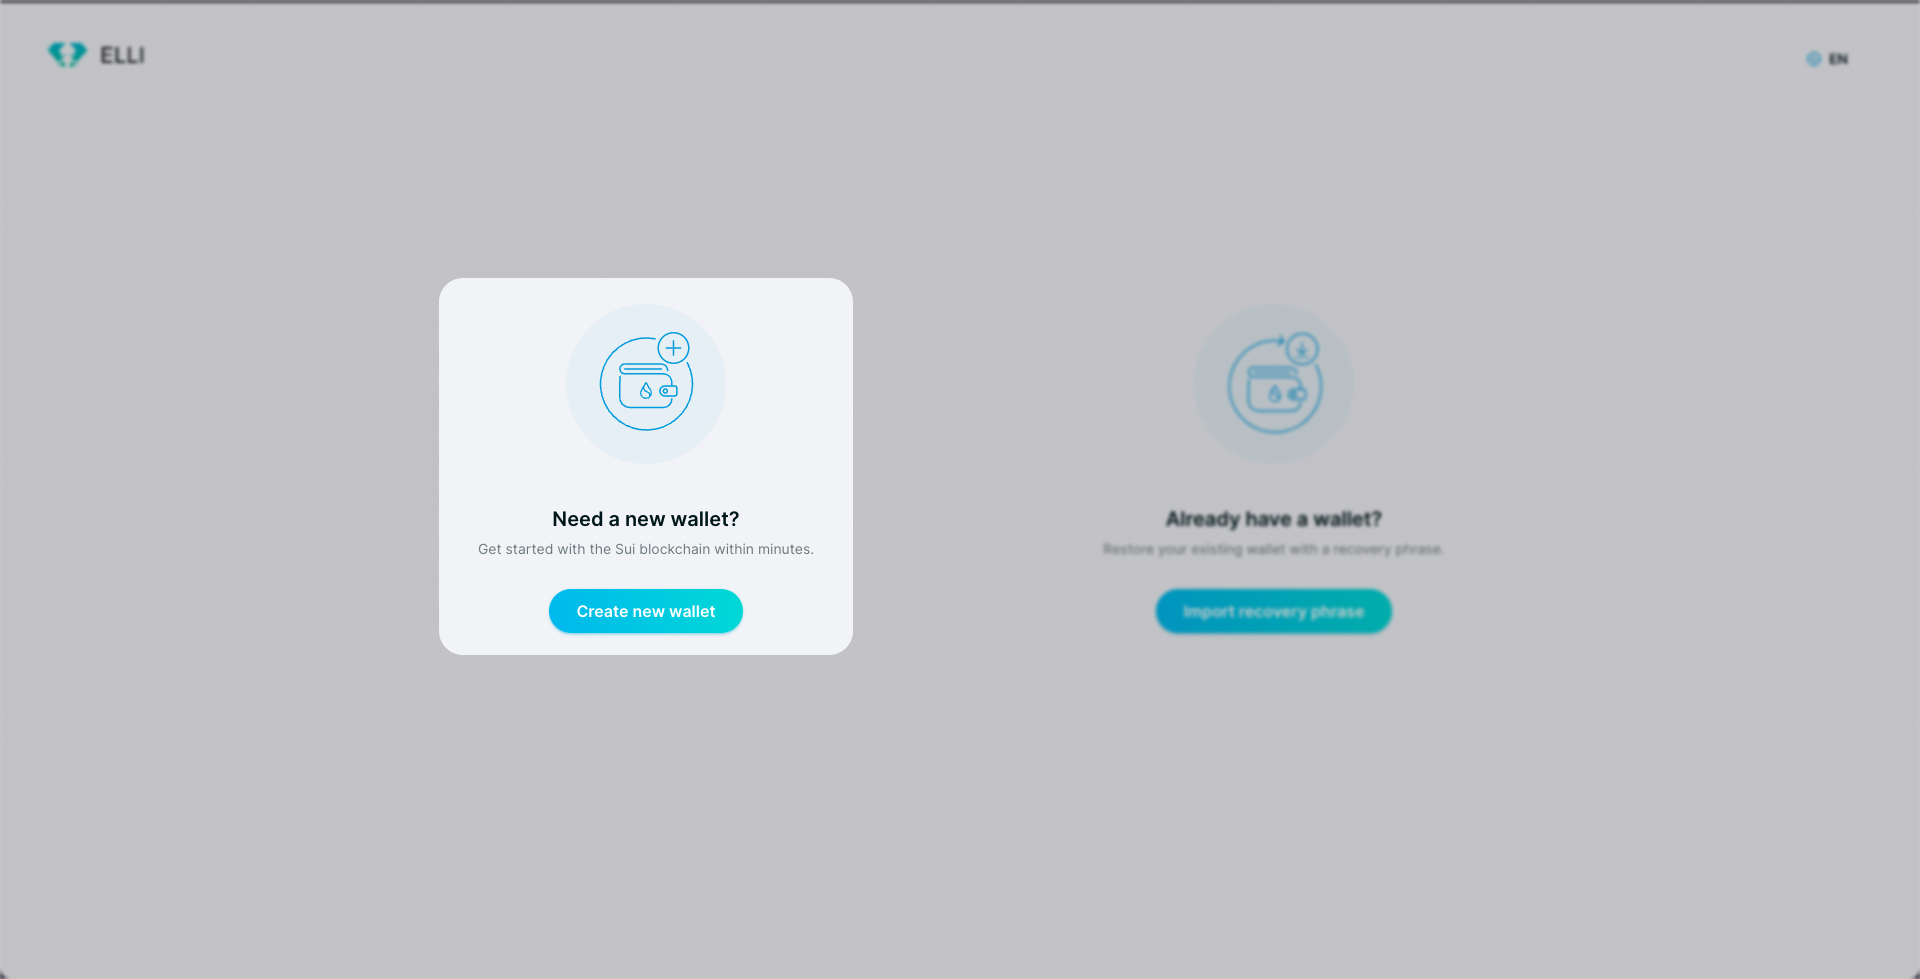
In your new tab, you are given two options to choose from.
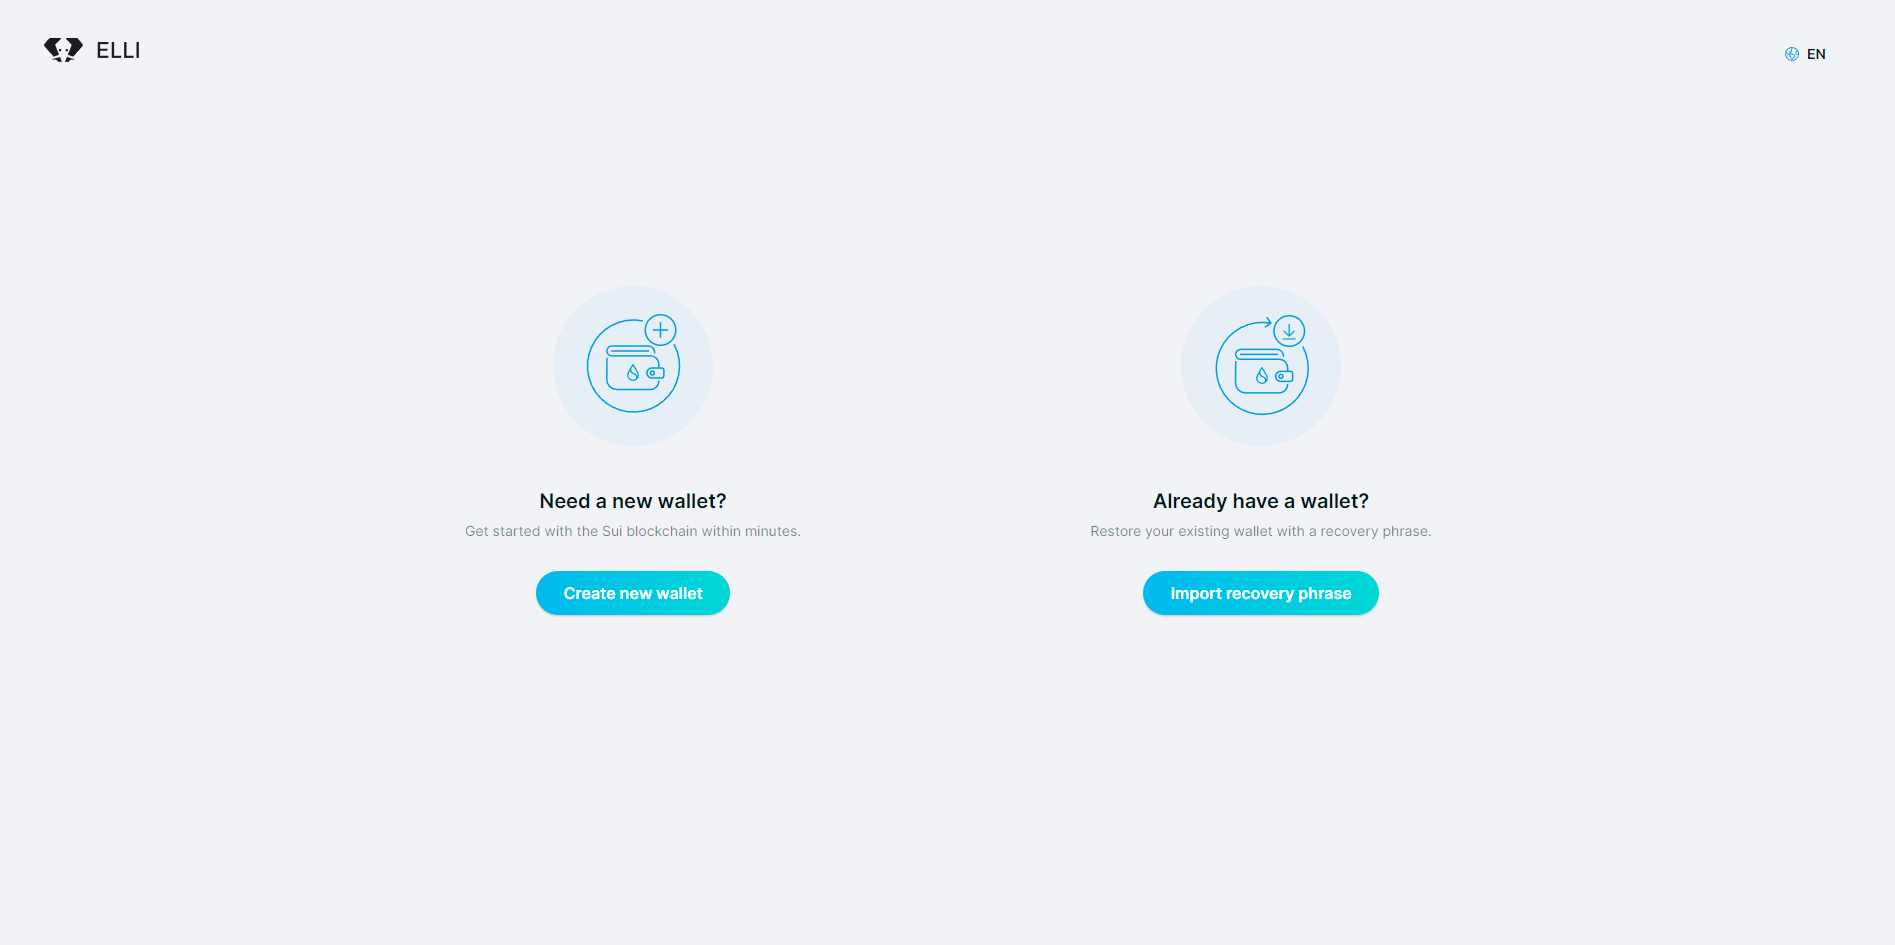
On the left side, you have the option to Create a new wallet. Choose this option if you are a first-time user of ELLI and would like to create your premiere ELLI Wallet. You can also choose this option if you already have an ELLI Wallet account, but would like to create a new one.
On the right side, you are given the option to import the recovery phrase of your existing ELLI Wallet. Choose this option if you already have an ELLI Wallet account and would simply like to log in. This process is explained in greater detail in a separate guide that you can findhere*.
Before picking either option, you can also choose your preferred language by clicking on the globe icon in the top right corner. You will notice the abbreviation EN next to the icon, showing you that English is automatically chosen.
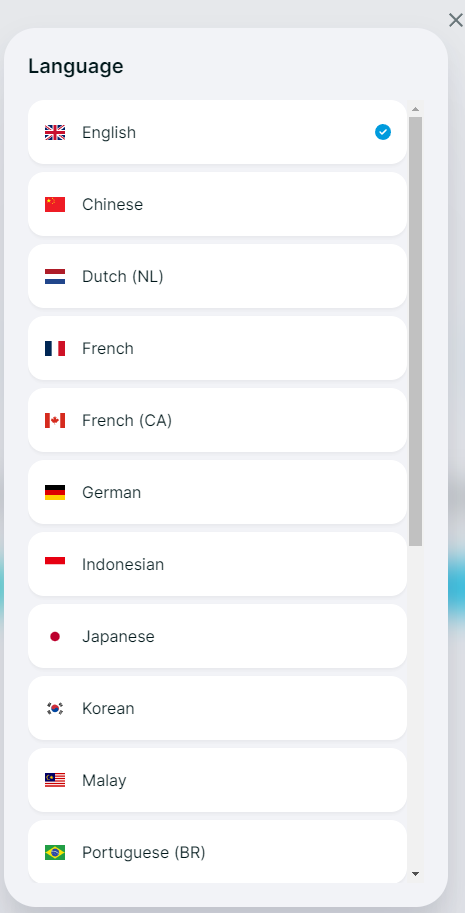
If you want to change your language preference, click on the globe icon and a pop-up menu will appear offering you different languages to choose from.
Let’s move on to one of the most important steps in this process, and that is creating a new wallet.
Step 5
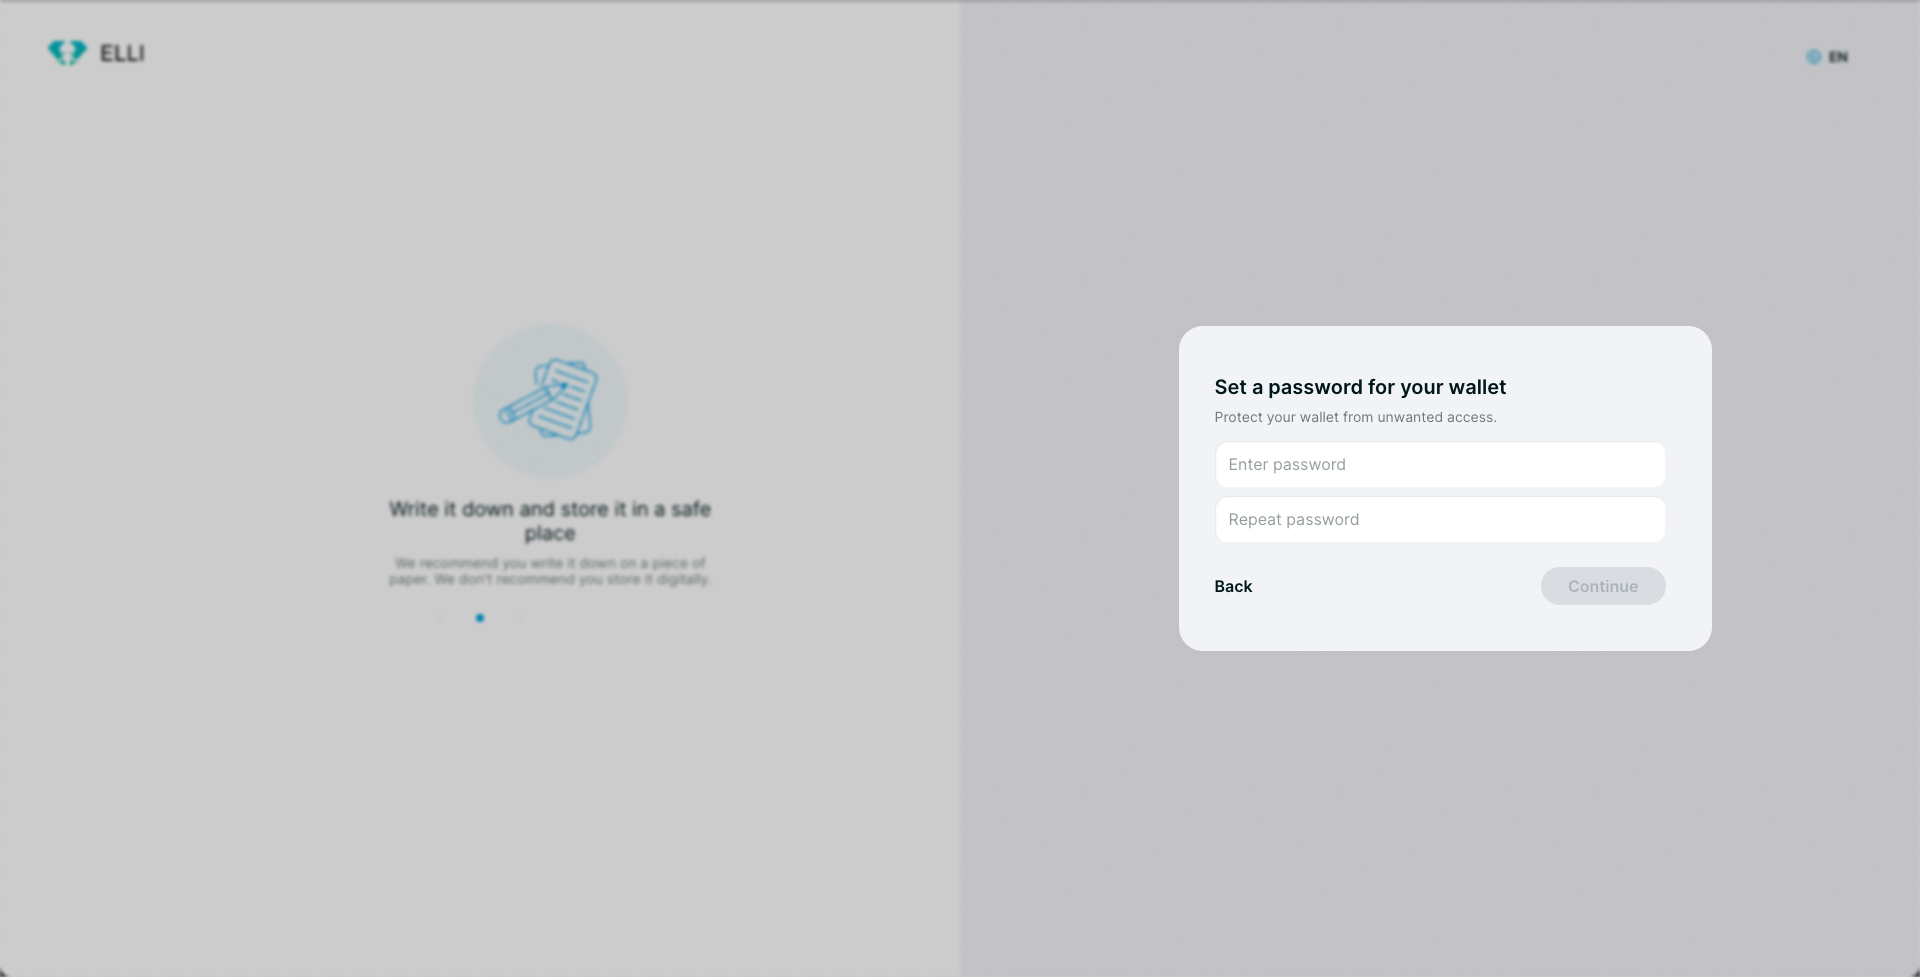
After you have clicked on the Create a New Wallet button, a new screen will appear.
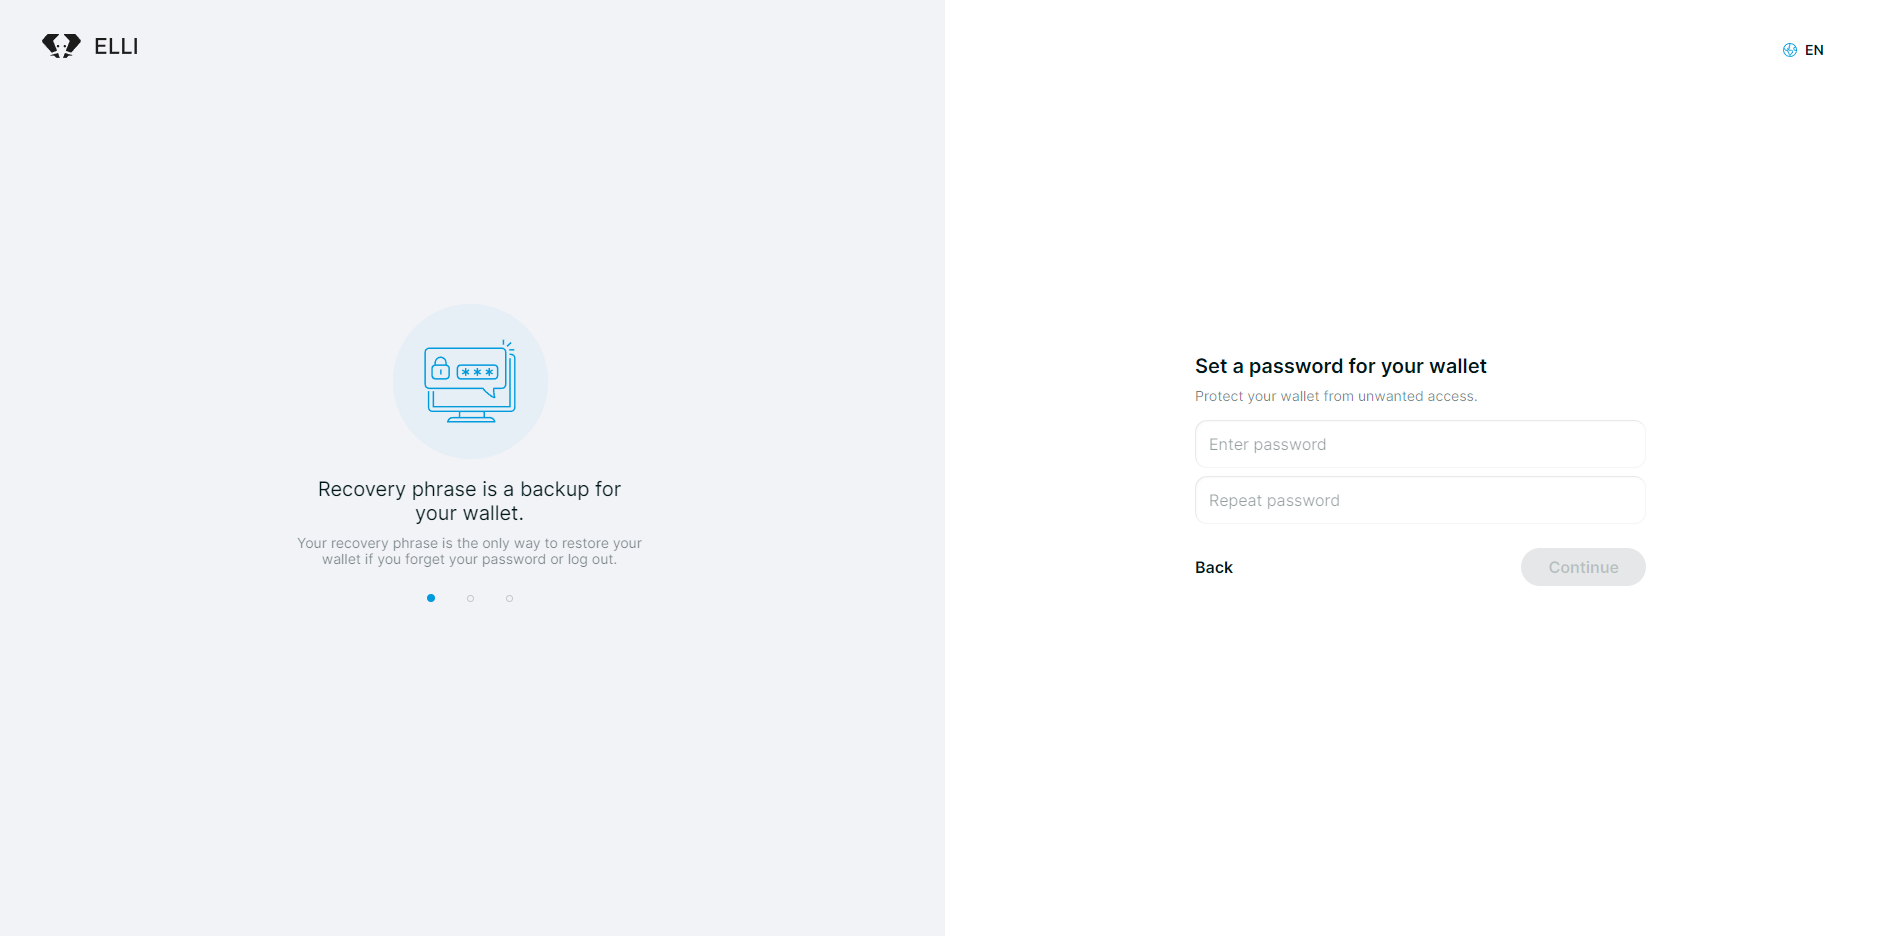
On the left side, you will see a slider with several useful bits of advice. We’ll explain those in another chapter because that advice is actually incredibly important and crucial for your safe and easy use of ELLI.
On the right side, you are asked to set a password for your wallet. We advise you to use a strong password that is hard to crack. It can be a phrase combined with symbols and numbers, for example. Whatever you choose as your password, make sure it is something you can easily remember or access from a highly secured storage.
Once you have entered and repeated your password, click Continue.
Step 6
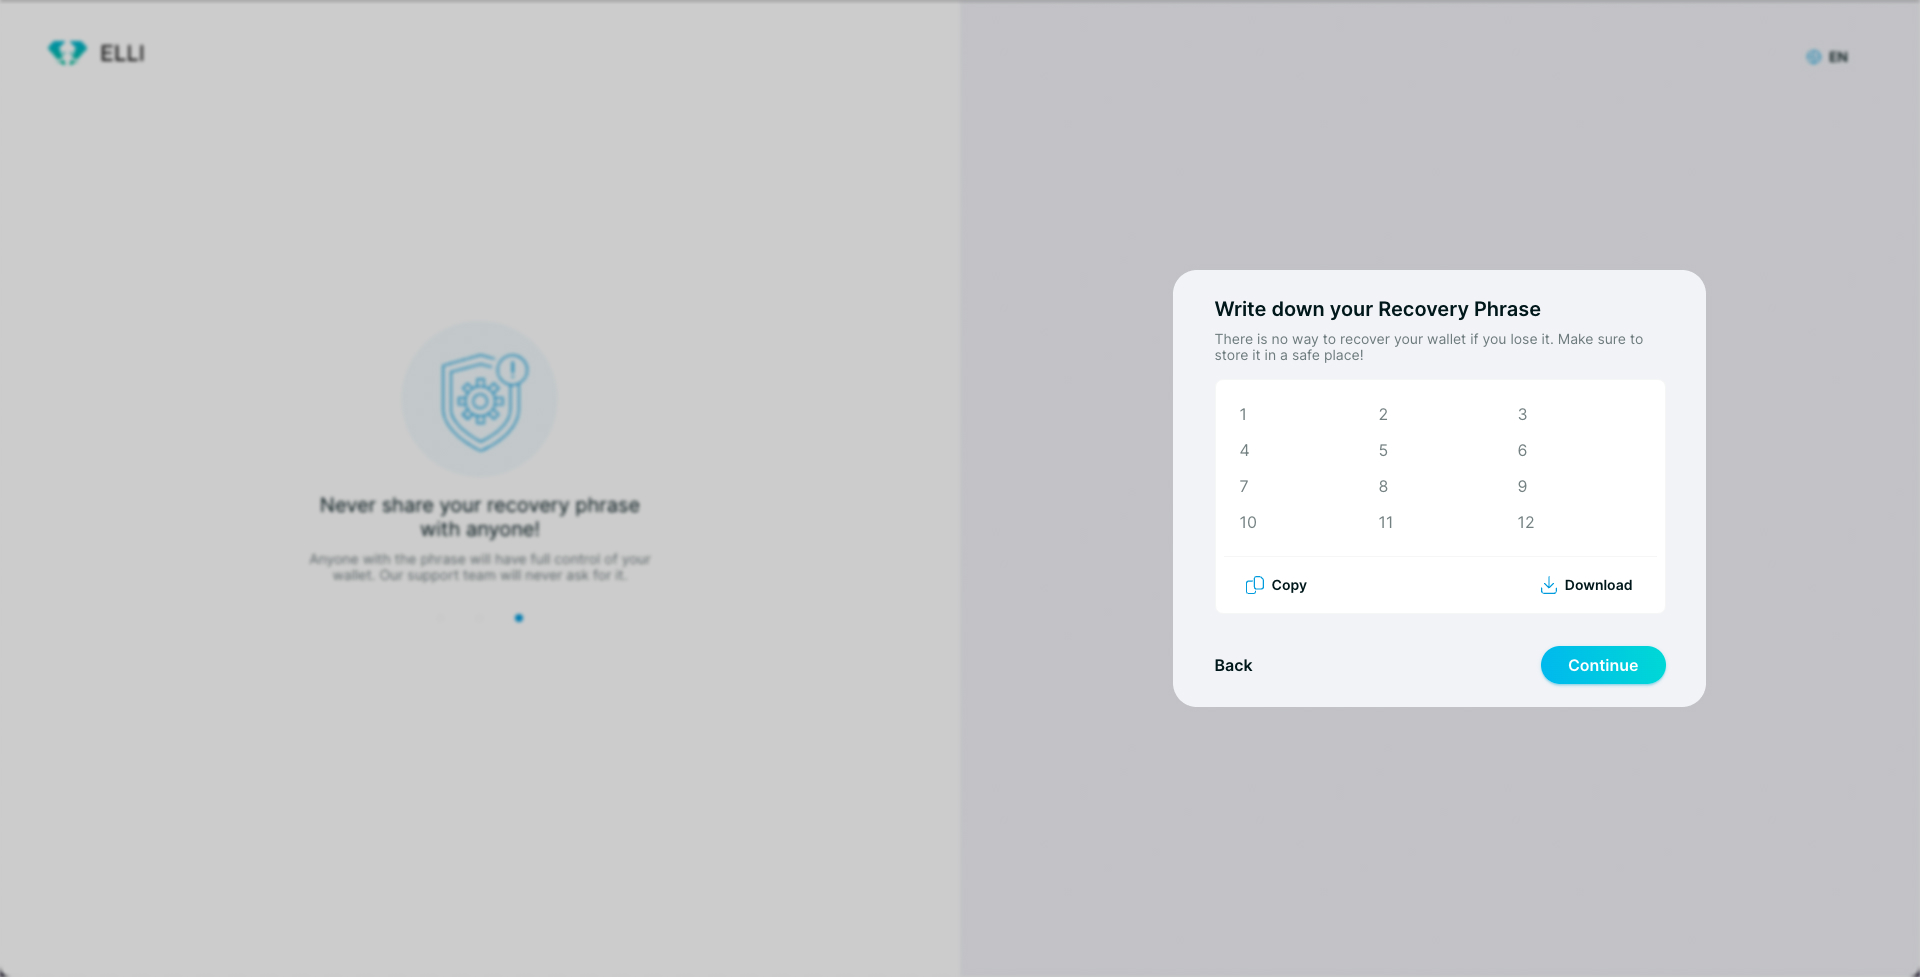
After clicking continue, a new menu will appear showing your Recovery Phrase.
IMPORTANT!This is the most important part of your wallet creation process, as your use of the ELLI Wallet depends on it.
Your Recovery Phrase is randomly generated and consists of twelve words. Some may be repeated, but this is not always the case.
It is crucial that you save these twelve words in the order they are presented.
Below the list you will find two options for saving your Recovery Phrase. Copy on the left side, and Download on the right side.
If you choose Copy, your Recovery Phrase will be copied to your clipboard and you can simply paste it wherever you want it saved. Pasting it into a text document looks like this:
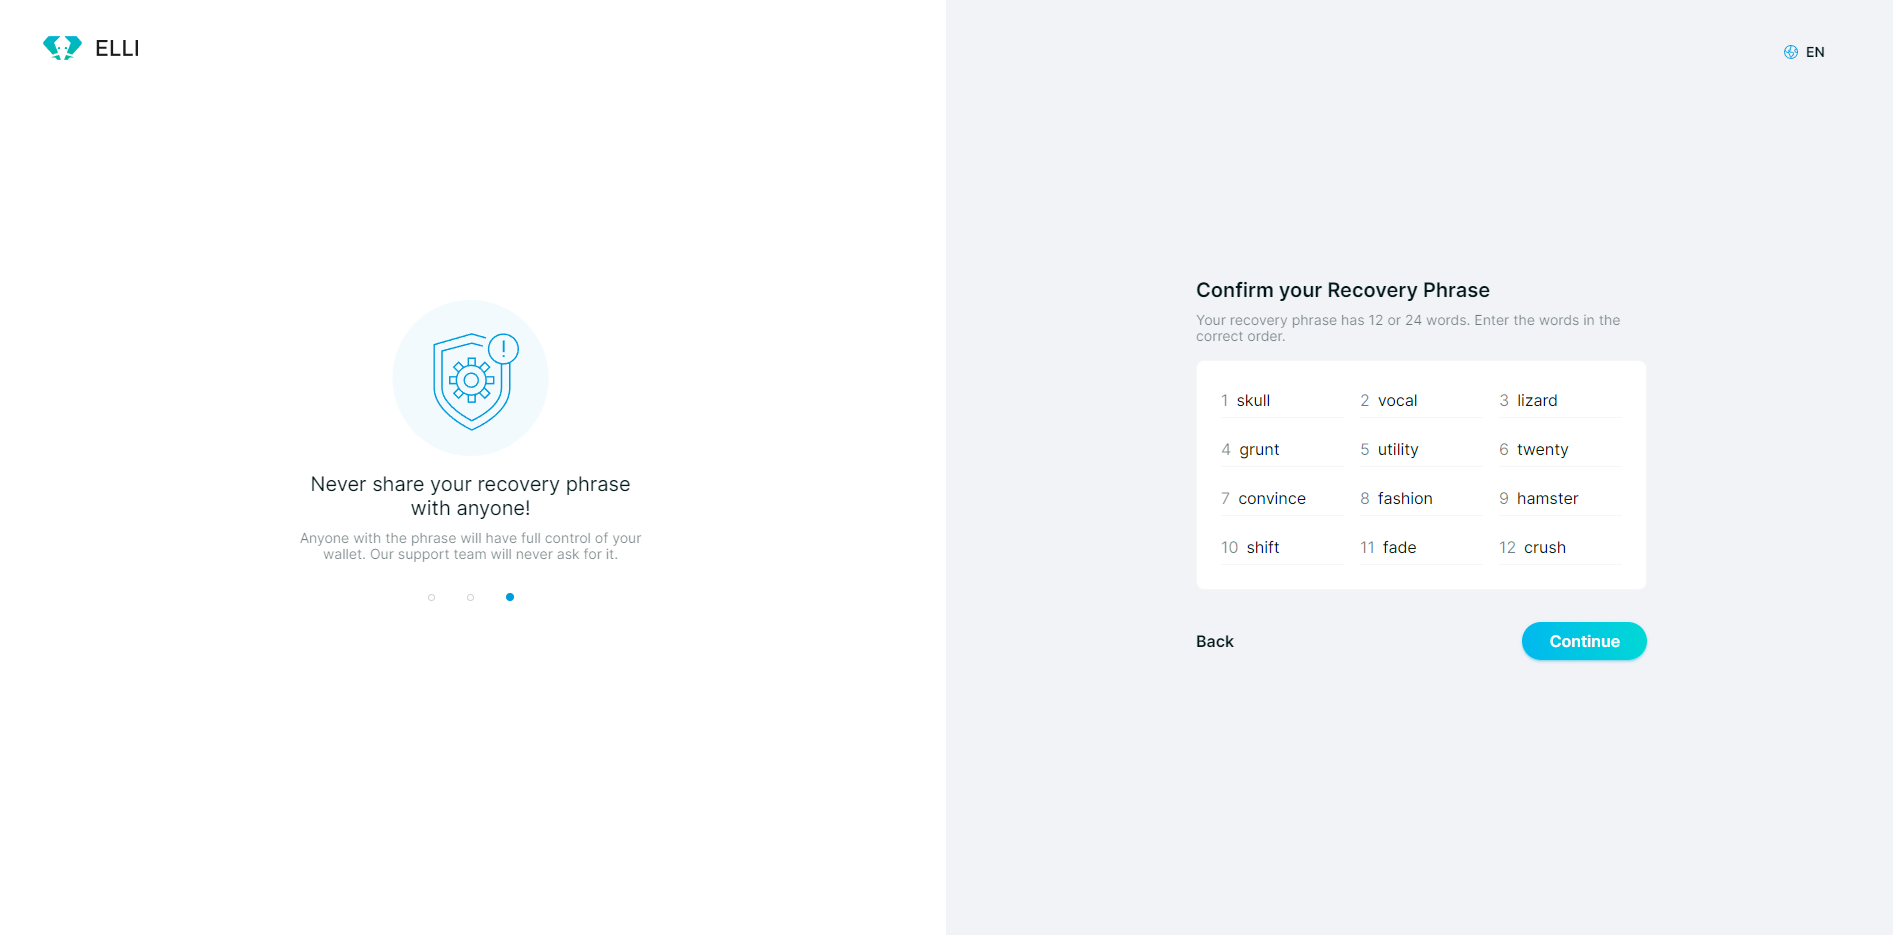
skull vocal lizard grunt utility twenty convince fashion hamster shift fade crushIf you choose to download your Recovery Phrase, it will be saved on your device as a text file named ELLI-backup.txt.
Whatever option you choose, you have to keep your Recovery Phrase privately stored somewhere with the highest level of security, a place that only you and possibly your most trusted people have access to.
If you lose your Recovery Phrase, there is no way of getting it back. You need it to log into your ELLI Wallet. Remember at all times: You cannot access your ELLI Wallet without your Recovery Phrase!
Once you have safely stored your Recovery Phrase, we can move on to the next step.
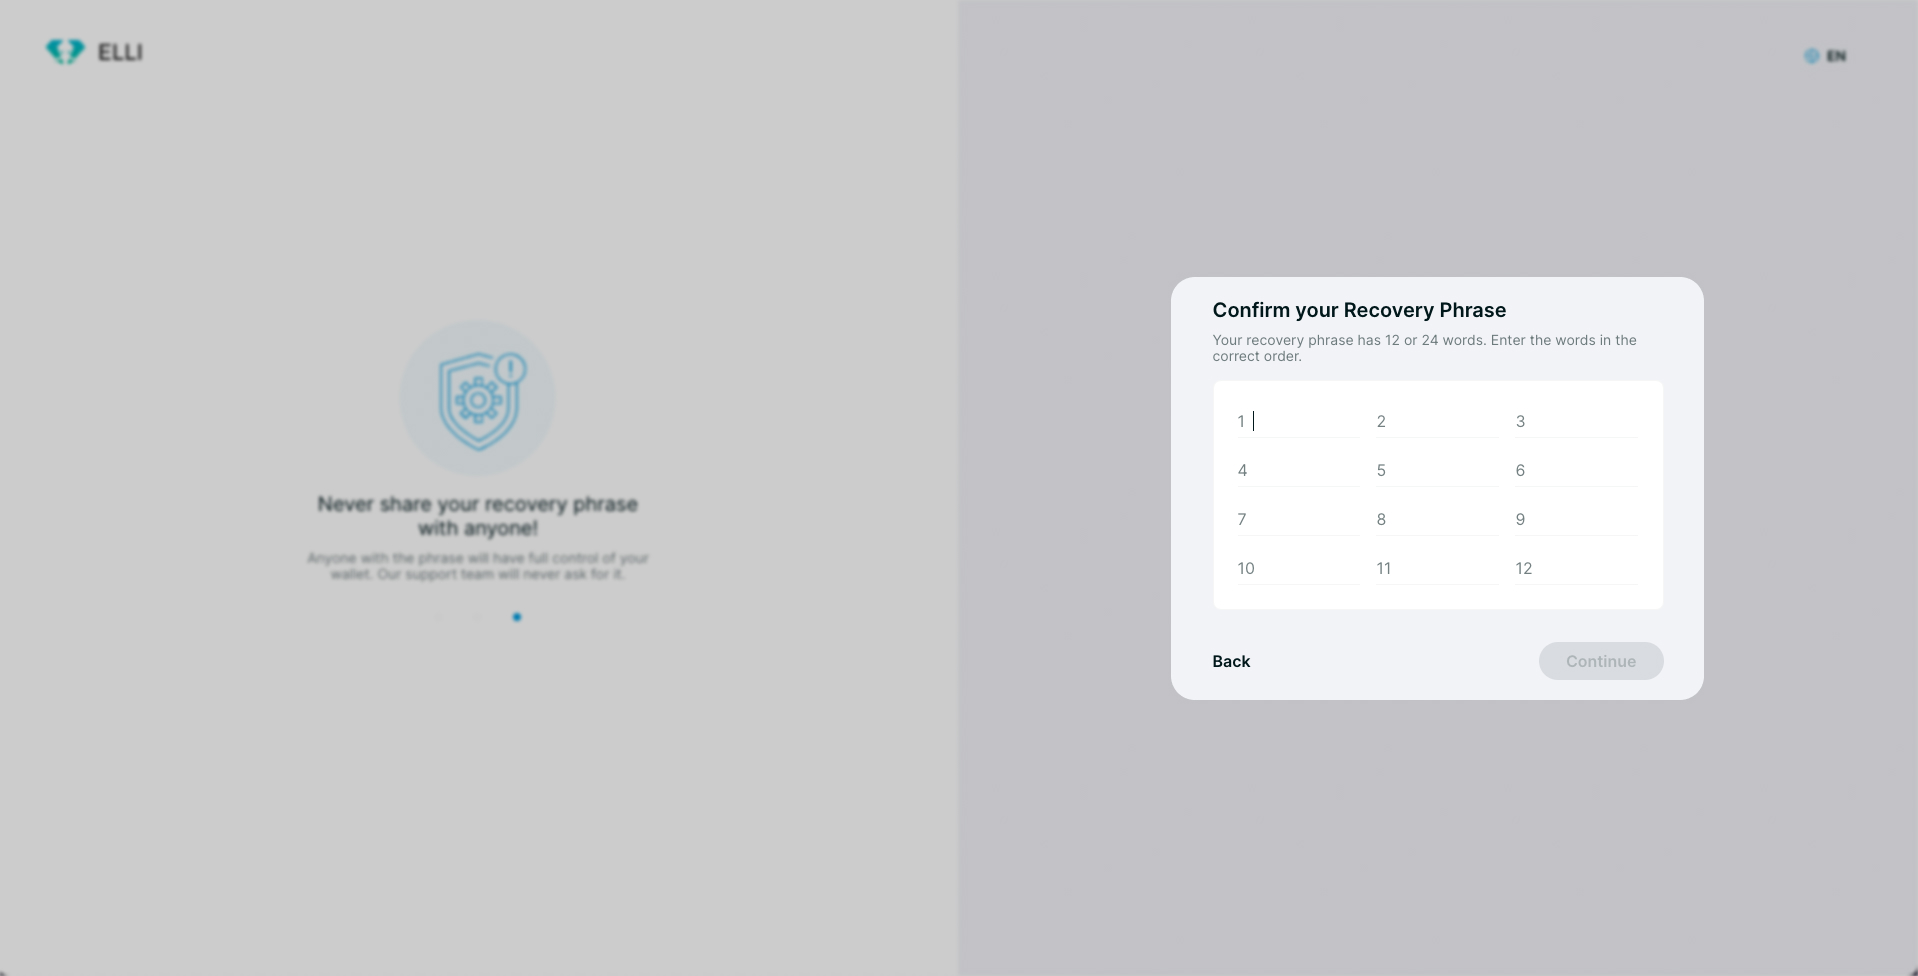
Step 7
After clicking on “I Saved My Recovery Phrase”, a new menu will appear asking you to confirm your Recovery Phrase.
Type in your Recovery Phrase. Make sure you have typed in all the words in their required order.
Once you have entered your Recovery Phrase, click Continue.
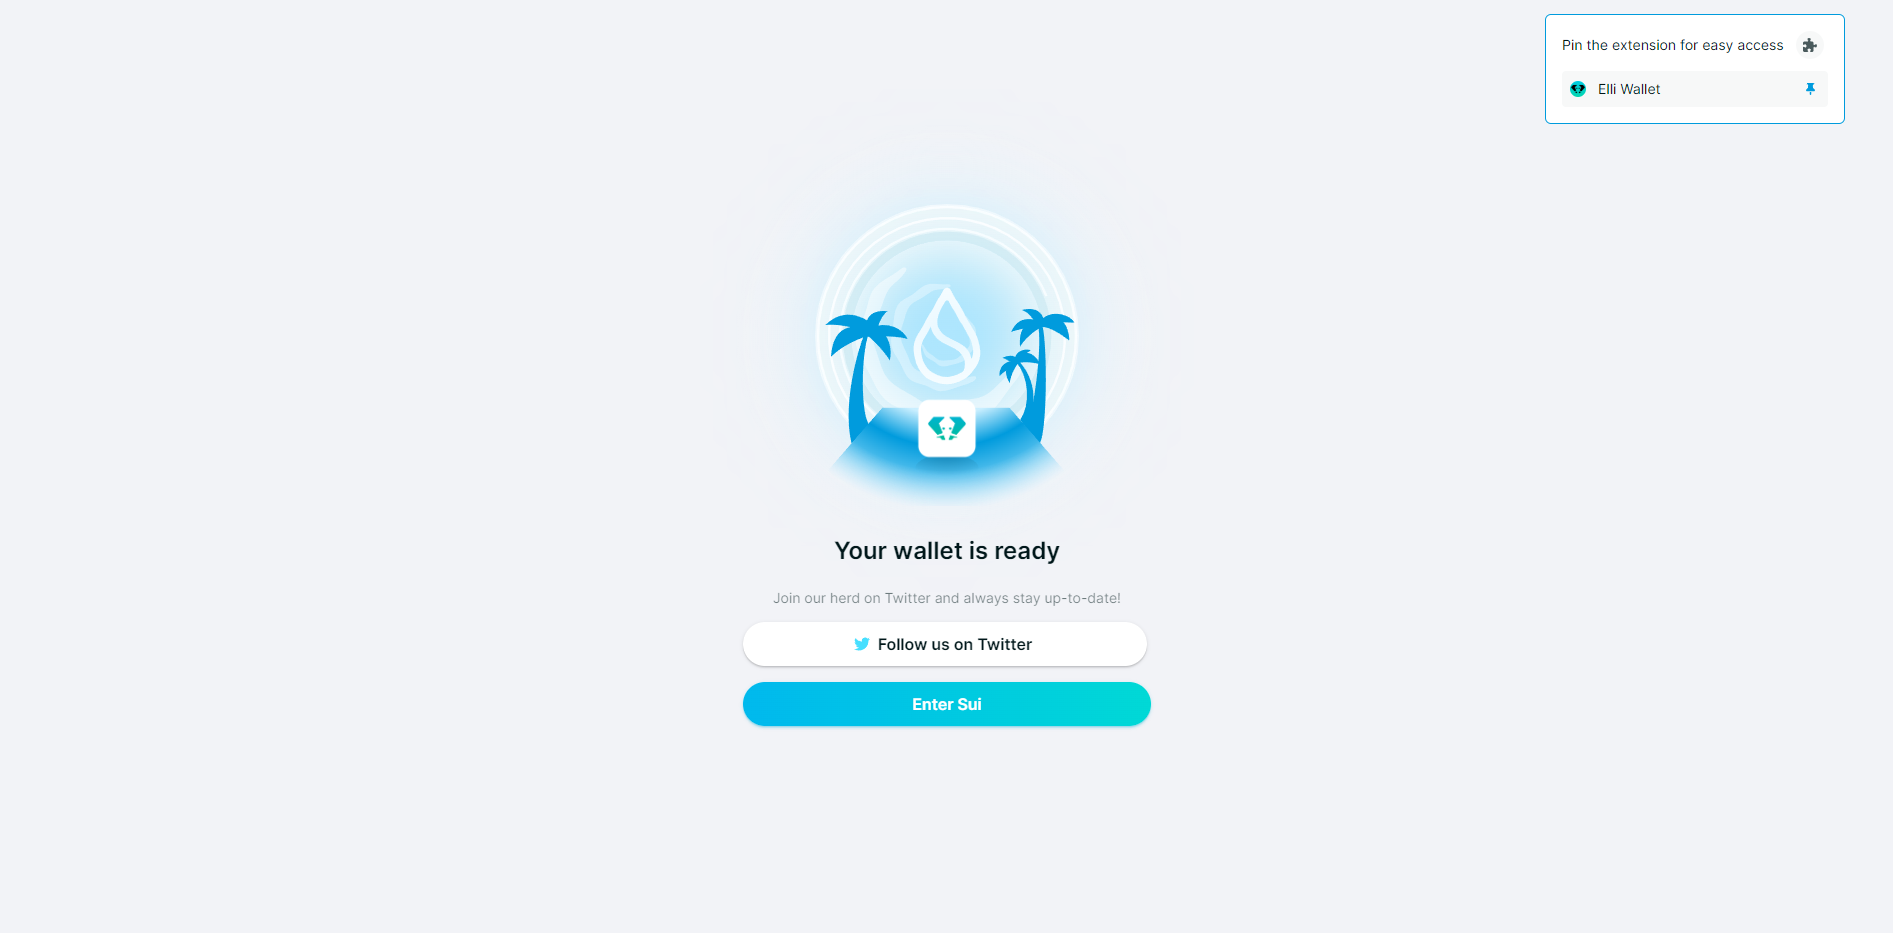
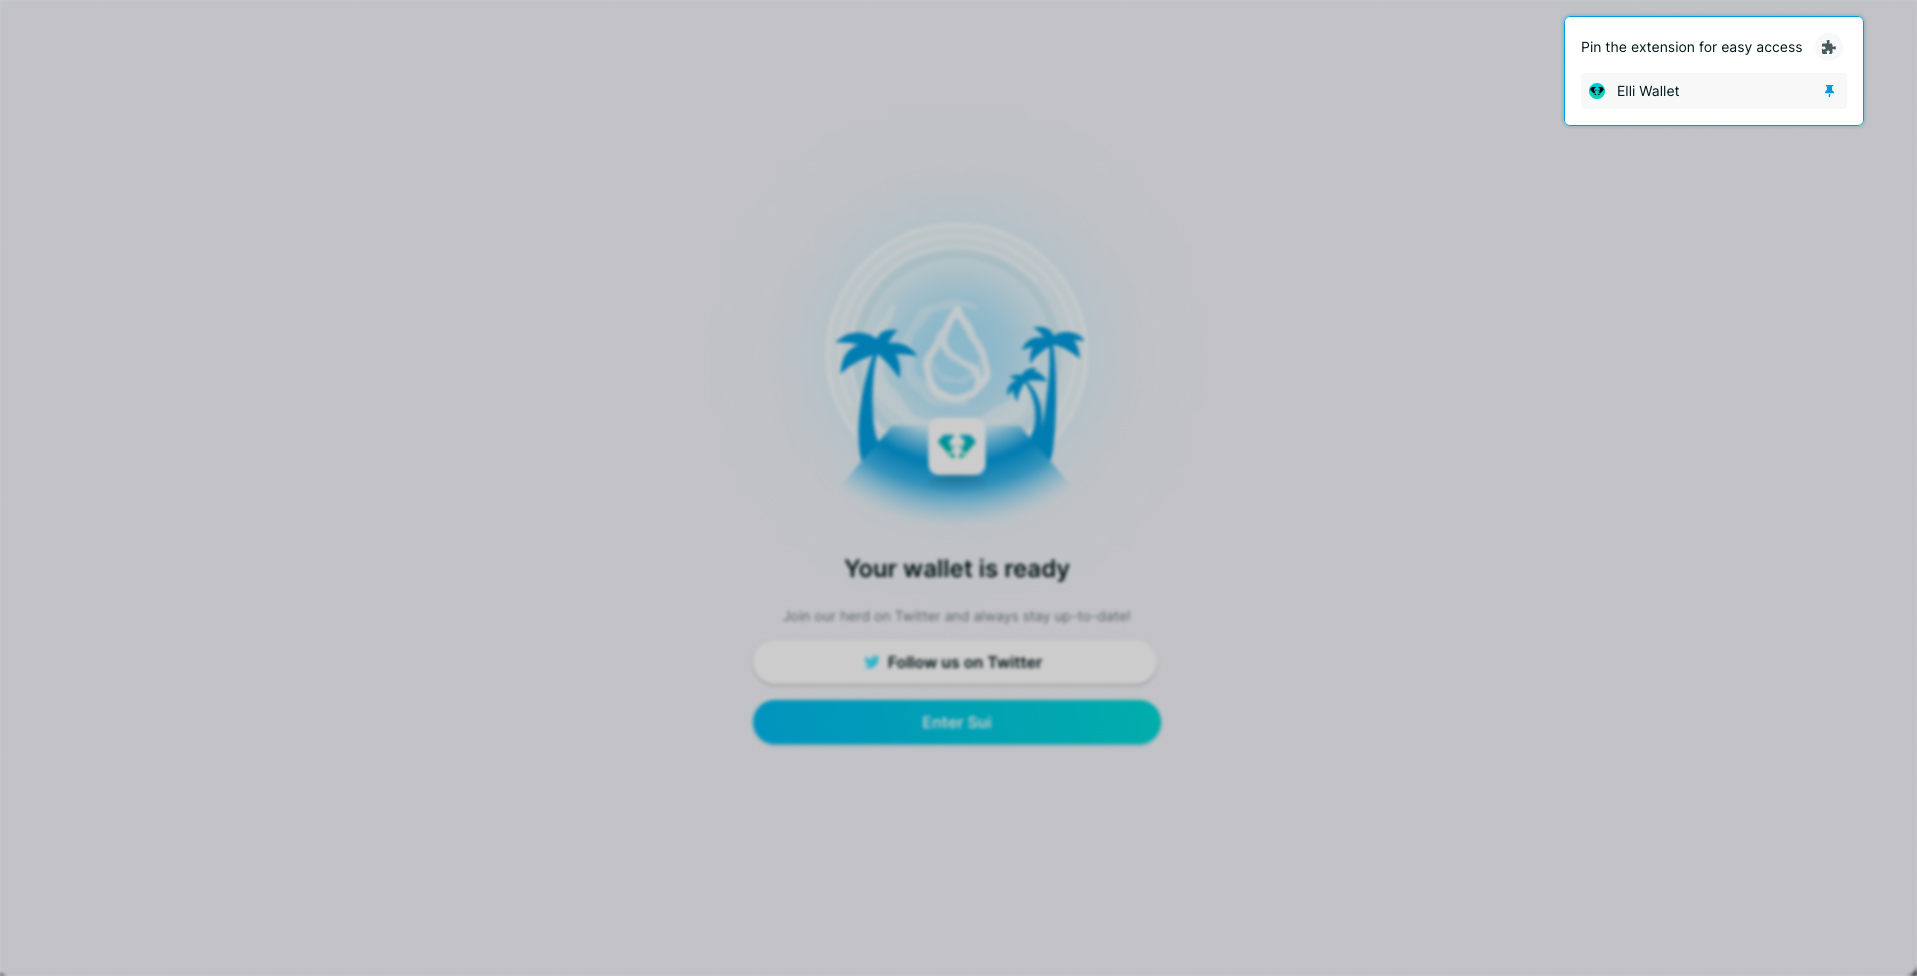
Ta-daa! Your Wallet is ready! Click “Enter SUI” to begin your ELLI Wallet experience.
You can also join our online community and stay up-to-date with all ELLI Wallet-related developments, crypto news and advice, as well as fun memes and discussions with other ELLI users.
Click on the buttons above to follow us on Twitter. See you there!
How to restore your ELLI Wallet
While restoring your ELLI Wallet may sound like something ominous, don’t worry. Restoring it doesn’t mean your wallet has been lost and now needs to be recovered - it simply means that you will have to log into your wallet again.
This is a common process after you have either updated to the latest version of the ELLI Wallet, or if you are using it for the first time in another browser. For example, if you typically use it with Chrome and would now like to try it out in Firefox, you will have to restore your current wallet if you want to continue using it in Firefox.
Restoring your wallet is a simple process, and we will walk you through it step-by-step.
Step 1
After installing your ELLI Wallet for the first time in a different browser or updating your existing browser extension, to access it you will need to click on the ELLI Wallet icon in the upper right corner of your browser toolbar.
After clicking the icon, a new tab will open asking you to choose between creating a new wallet or continuing using your current wallet.
Keep in mind that you can create a new ELLI Wallet at any time, even if you are already using it.
In order to use the latest version of the ELLI Wallet with your current account or to use your current account in a new browser, choose the option on the right side.
Click “Import Recovery Phrase” and proceed to the next step.
Step 2
Now we can move to the most important step of this process - using your recovery phrase to access your existing ELLI Wallet account.
As we have explained in a previous guide, saving your recovery phrase is crucial for the continued use of your ELLI Wallet. If you don’t know your recovery phrase or have not saved it, you will not be able to access your existing ELLI Wallet account.
Once you click on the “Import Recovery Phrase” button, a new screen will appear, asking you to set a password for your wallet. This is the password you will be using with your current browser.
Once you have typed in and repeated your password, click “Continue”. Of course, before continuing, make sure you can remember your password, or have secured it.

Step 3
After clicking continue, a new menu will appear, asking you to import your recovery phrase.
Type in your 12 or 24-word recovery phrase, making sure that all the words are listed in the correct order.
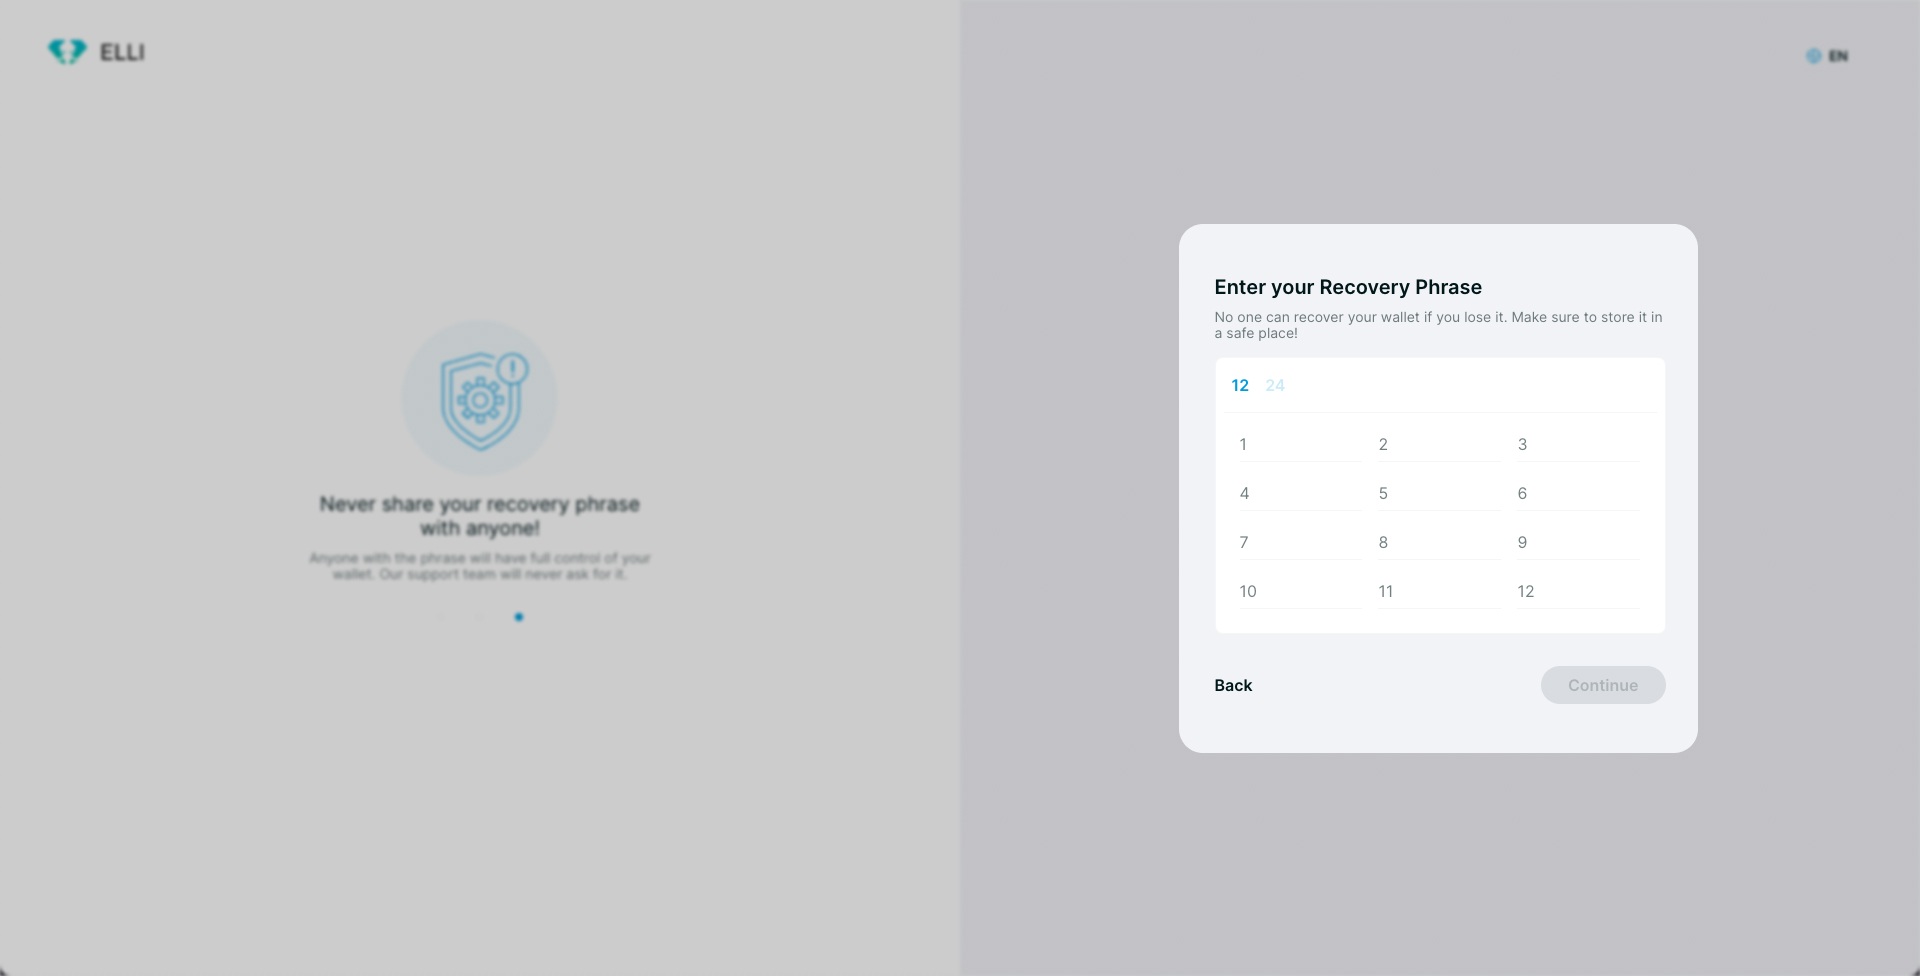
Once you have typed in your full recovery phrase, click “Continue” to finish this process.
That’s it! You have successfully entered your recovery phrase and can now continue using your current ELLI Wallet account.
How To Get Started With ELLI
Let's get your wallet set up
ELLI is a next-generation non-custodial wallet that enables universal access to the SUI blockchain and its associated applications.
Generating New Wallets
Generating an ELLI wallet can be done in a couple of easy steps. You can make one by visiting our website and choosing between Firefox and Chrome extensions.
How to Generate a Wallet with a Recovery Phrase
- Desktop Guide
Importing Existing Wallets
- Import a wallet using its private key.
- Access SUI wallets created elsewhere.
Welcome to ELLI!
To keep up with updates be sure to follow us on the following social
channels.
Twitter: https://twitter.com/elli_wallet
Crew3: link
If you have any questions, please get in touch with us using our customersupport chat.
How to Generate a new ELLI Wallet with a Recovery Phrase
This guide shows you the quickest way to set up a new ELLI wallet
Step 1
- Go to https://elliwallet.com/ and click Download for.

Step 2
- Click Create A New Wallet.
Step 3
Set a password for your wallet and click Continue.
Step 4
- Write down your Recovery Phrase and store it in a safe location.
- Once you have done so, click I Saved My Recovery Phrase.
Note: You can download your Recovery Phrase as a .txt file but it is recommended that you encrypt this file immediately if you choose to download it.
Step 5
- Type in each word of your Recovery Phrase and click Continue.
Note: If you downloaded it as a .txt file, you can upload it here rather than type it in manually.
That's it!
You've now successfully set up an ELLI wallet. If you want to see what you can do with it, check out the guides and articles in the Knowledge Base.
How to send tokens to another wallet
Whether you're new to the world of cryptocurrency or just need a refresher on how to send tokens, this guide will take you through the process step-by-step. We understand that your tokens are important to you, and we want to ensure that you can safely and securely send them to the intended recipient.
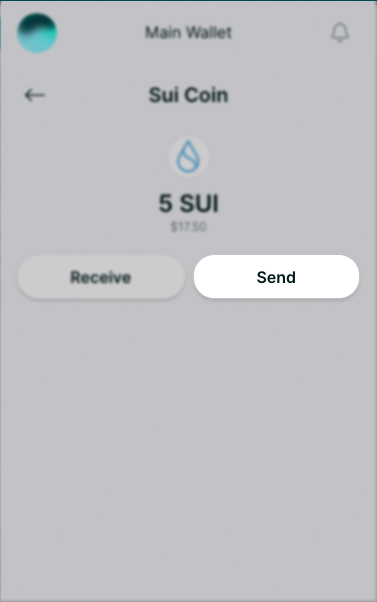
Step 1
- Open the ELLI extension and click on which asset you want to send.
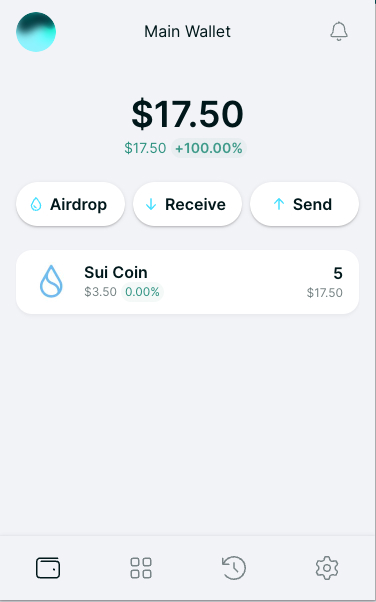
- Click on Send
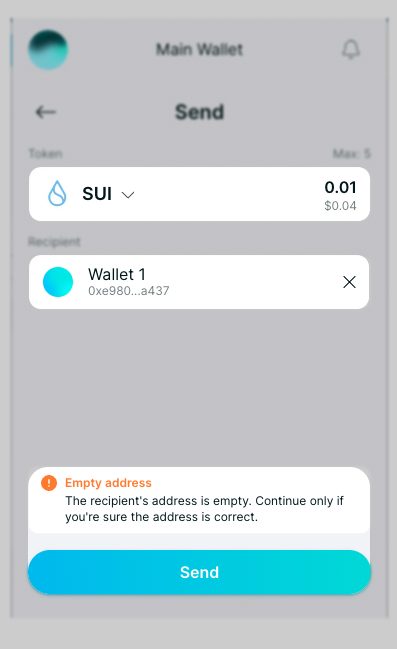
Step 2
- Type in how much you want to send
- Paste in the public address you want to send the token to or click on their saved contact name.
- It's recommended that you save contact for the wallets you interact with. You can manage your contacts in our address book located on the settings page.
- Click Send
- Confirm the transaction
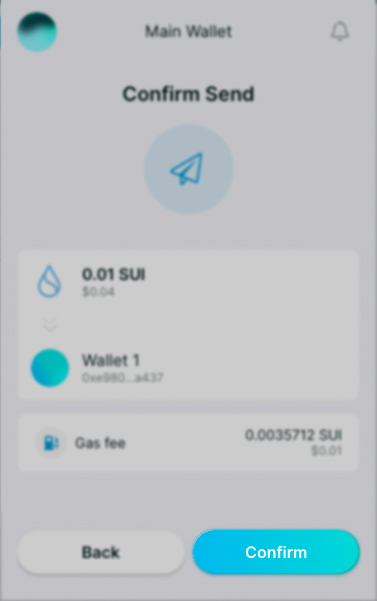
- The Success banner will appear at the top of the extension once the transaction has been confirmed. You can view the details of every transaction ever made on ELLI on the SUI Explorer.
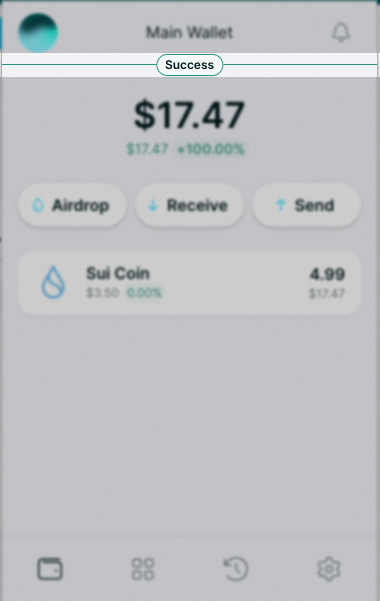
- You can check your latest transfer as well as all the transaction history in the Activity tab located at the bottom of your ELLi extension.
If your transaction failed please double-check that you have enough SUI coins in your portfolio balance to cover transaction fees. It’s recommended to have 0.1 SUI at all times to avoid any gas-related issues. If you are still unsure about what caused the transaction failure you can always reach out to our support team.
How to Import your SUI wallet into ELLI using a private key
For clarity’s sake, the private key is not the recovery phrase. Your mnemonic unlocks the private key that then gives you access to your capital. Usually, you will not need to utilize the private key but some wallets will give you access to it.
If a wallet does not give you access to your private key, you can simply input your mnemonic phrase into the ELLI wallet access page and you should be good to go. This guide assumes you have made a new ELLI wallet with a recovery phrase.
If you didn't you could follow this guide: How to Generate an ELLI Wallet with a Recovery Phrase
Step 1
- Access your ELLI wallet of yours and click your account icon in the top left corner.

Step 2
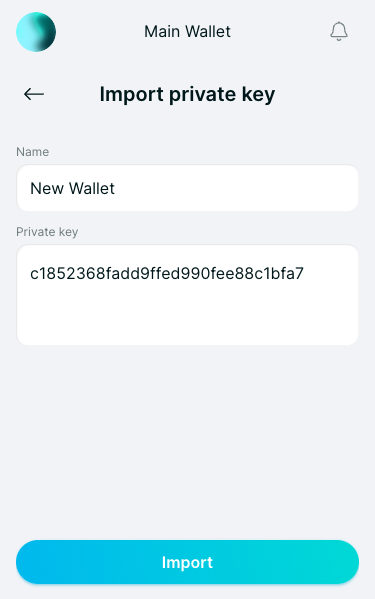
- Click Import Private Key.
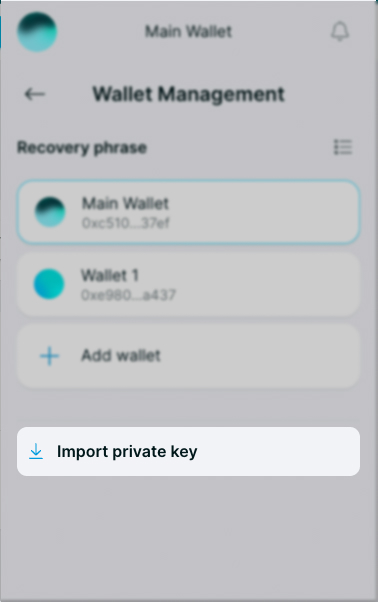
Step 3 (two parts)
- Type in what name you want the account to be called.
- Paste your Private Key into the "private key" field and click Import.
You're all Set
You'll be taken to the dashboard of the wallet associated with your Private Key
When you click on your account icon again in the top right corner, you'll see that you can easily navigate between your new ELLI wallet and the one you just imported with the Private Key.

Please be aware: If you lose either your Private Key there is, unfortunately, no way to access the associated wallet.
Note: You'll need to repeat this process if you are ever logged out or are logging in on a new computer.
Can you help me recover my lost assets?
ELLI can’t help you recover stolen or lost assets.
Due to the way on-chain transactions on the SUI blockchain work, they can’t be reversed. This means if a coin was sent to another account, only that account has the authority to send them back. This is true for all other decentralized blockchain networks
Furthermore, ELLI is a non-custodial product. This means that we don’t have access to any of our user’s data, including their Recovery Phrase, or the ability to freeze or seize any account. We recommend the user take safety measures to secure their phrase since we can’t retrieve assets stolen by a bad actor gaining control of the user’s wallet via their Recovery Phrase
Here are some typical situations you may encounter as a user:
- I have sent SUI to a centralized exchange (CEX) and it isn’t showing up!
They might take up to 24 hours to be settled into your account. If the transaction shows as completed on an SUI blockchain explorer, we suggest you get in touch with the CEX’s support
- I have sent other SUI-based tokens (e.g. USDC) to a CEX and they aren’t showing up!
There are CEXs that only partially support SUI-based tokens. If the exchange eventually lists that SUI-based token it may be made available on your account, otherwise you should contact the CEX so they inform you if it's possible to retrieve those assets. Usually, this entails a finder’s fee
- Someone obtained my Recovery phrase and stole my tokens; can you get them back?
Suppose you’ve given away your recovery phrase. In that case, we can’t help you recover the assets, as stated previously as there is no method to stop funds or assets from being transferred out of a compromised wallet. You must abandon that wallet and recovery phrase and generate a new one. If you’ve noticed that there are other assets left, you must act quickly and send whatever is left to a new address. This, however, is a risky procedure, as the scammer/thief might still be on the lookout.
- Someone stole my assets but there are still some leftovers, is it safe to move these tokens?
If you think your tokens were manually stolen, there might be an opportunity to recover whatever you have left. We suggest contacting our support team, since we may be able to guide you on the best course of action, even if we can’t retrieve whatever was already stolen.
Forgot your ELLI wallet password?
If you forgot your password, you can reset it by clicking “Forgot Password?”

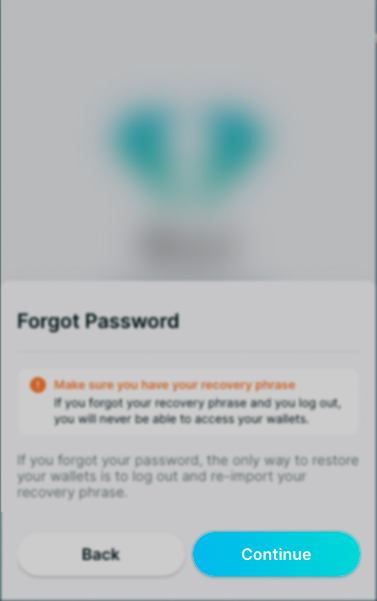
Then will be asked to type CLEAR DATA, capitalized.
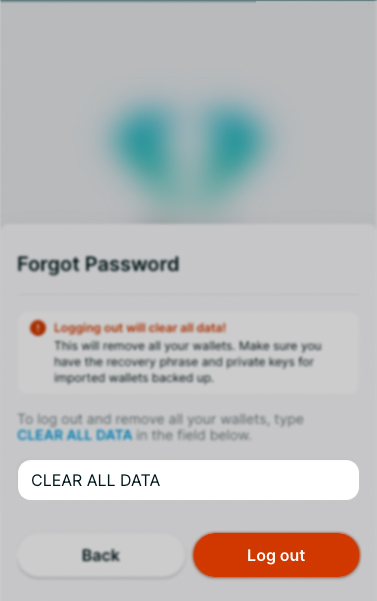
⚠️You will need your Recovery Phrase to continue since starting this process will log you out of that device and you will need to log in again.⚠️After you input your Recovery Phrase, you will be asked to set up another password.
Keep in mind that these passwords are different for every browser you have the extension set up, and are stored at a local level, meaning it won’t necessarily be the same password on your other devices.In this way, ELLI never has access to your password.
Your Recovery Phrase is the only way you will be able to log in after you log out of your account. Since ELLI is a self-custodial product, we don’t keep any of your data, and your Recovery Phrase isn’t tied to your e-mail address, nor do we keep your e-mail address on any of our servers.
I lost my recovery phrase/private key, what can I do?
ELLI is a “user custodial wallet”. This means that no one controls your accounts except for you (or anyone else who gets ahold of your Recovery Phrase or private keys). Since we do not hold your private keys on a server that we maintain, or for that matter, at all, we are unable to recover them for you. The last resort is that you are hopefully still logged into that wallet on any device and you could export your recovery phrase or the private key from there.
Recovery Phrase:
Access your wallet
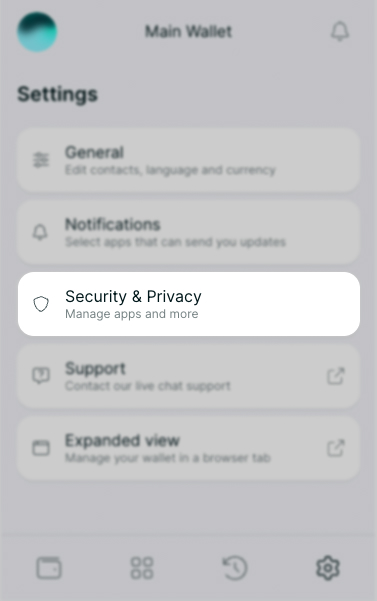
- Click on the Settings icon (⚙️)

- Choose Security and Privacy.
- Select Export Recovery Phrase

- Tick the check box and click on Show and your Recovery Phrase will show in the middle text box.
Private key:
Access your wallet
- Click on the account switcher icon (PFP)

- Hover over the desired account with your mouse cursor and click on the Settings icon (⚙️).
- Then select the option Export Private Key.
- Tick the check box and click on Show and your private key will show in the middle text box.

Note:
Although a Recovery Phrase can access multiple wallets, it is done so by accessing the private keys of these wallets. So when you export a private key, it is only for the current account that you are logged into.
Do NOT store this in the cloud or on your device (doc, jpg, screenshot).
Write it down on a piece of paper and store it in a safe place!
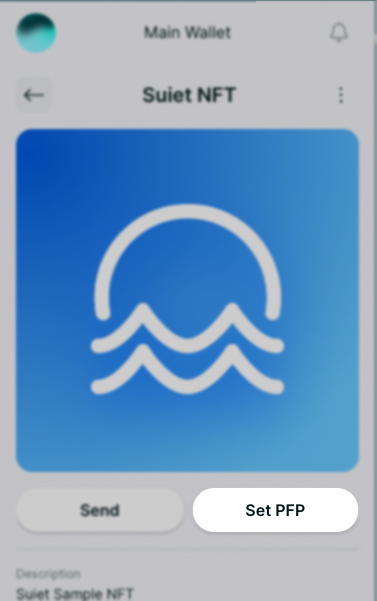
How to set up a profile picture for your ELLI wallet
Do you have a favorite NFT that you are super proud of? Great! Within the ELLI wallet, you can set that (or any other) NFT as your wallet profile picture (PFP).
How to do it? Follow these few easy steps.
Step 1
- Access your ELLI wallet and click the NFTs tab
Step 2
- Open the desired collection and select your favorite NFT
- Click Set as PFP
Step 4
- Confirm the transaction.

And you're done! Your wallet has an awesome profile picture now!

ELLI Notifications Explained
As the popularity of cryptocurrencies and blockchain technology continues to grow, more people are turning to digital wallets to manage their digital assets. One crucial feature of a cryptocurrency wallet is the ability to receive notifications.
Notifications keep you updated on your wallet activity, enabling you to make informed decisions about your digital assets. The ELLI wallet offers three types of notifications to accomplish that: activity notifications, dApp notifications, and NFT notifications.
Activity Notifications:
Desktop notifications are alerts that appear on your screen, providing real-time information about your digital assets. The following are the four types of desktop notifications offered by ELLI:
- Inbound Asset Notification (Default On): This notification informs users when they receive an asset in their wallet.
- Outbound Asset Notification (Default Off): This notification informs users when they send an asset from their wallet.
- Inbound NFT Notification (Default On): This notification informs users when they receive an NFT in their wallet.
- Outbound NFT Notification (Default Off): This notification informs users when they send an NFT from their wallet.
Additionally, desktop notifications also include general updates from the ELLI team.
dApp Notifications:
dApp notifications are blockchain-specific notifications that keep users updated about their decentralized applications. The following are some of the events that dApp notifications can provide real-time alerts for:
- Changes in validator fees for staking.
- Availability of farming rewards on a DeFi protocol.
- On-chain derivative limit orders being filled.
- DAO votes that require user input.
- General updates from subscribed dApps.
NFT Notifications:
NFT notifications are designed for you as an NFT holder who wants to stay informed about your NFT collections.
ELLI's NFT notifications allow you to subscribe to receive alerts from specific NFT collections. This feature gives NFT collections the opportunity to require subscribed users to hold a specific NFT in their wallet to be eligible for notifications.
The following are some of the events that NFT notifications can provide real-time alerts for:
- Whitelists for NFT projects.
- Airdrops for NFT holders.
- General updates from subscribed NFT projects.
Conclusion:
In summary, notifications, in our opinion, are an essential feature of any next-gen cryptocurrency wallet as they ensure that you stay informed about the status of your digital assets, have greater control over your investments, and help you make smarter decisions overall.
SUI Trusted App User Guide
The ability to connect to decentralized protocols, also known as apps, is a primary feature for non-custodial wallets.
Apps are similar to standard websites that can be viewed from a browser but they are built on a blockchain and have a unique gateway that allows you to connect a digital wallet to them.
While some protocols are more decentralized than others, all apps are ultimately as decentralized as the blockchain they’re built on and are only accessible with a digital wallet. In the same way that Solflare lets you connect to Solana’s apps, Rise lets you connect to Aptos apps, ELLI will let you connect to SUI’s apps.
Determining if an App is Trustworthy
Connecting to an app is usually as easy as clicking Connect or Launch App but knowing if an app is legitimate is more complicated. Always double-check the website URL you’re trying to connect to and bookmark it for future use. The correct URL for an app will be in its documentation or public social media pages.
You may not want to connect a well-funded wallet to a new application for the first time. It may be worth your while to set up a burner wallet as described in this article.
Interacting with Apps Safely
After you’ve connected to an app, you’ll be interacting with it by signing messages which confirm transactions on the blockchain. Once these immutable transactions are confirmed, they can not be reversed. In order to sign these transactions, you’ll need to grant an app permission to access your funds. This is where people get scammed. They will give permission to an application that is either malicious or gets hacked and withdraws their funds without their consent.
Please always consider the following:
- Does this project have an active website or social media presence?
- Are the most recent tweets that it has been hacked or is it blocking people who are claiming it to be a scam?
- Are reputable people connected to the project? Note: many pseudonymous developers with good reputations are publicly verifiable.
- Are there community help channels for this project?
- Do representatives from the project respond to users’ inquiries?
- Have there been any recent security breaches of this project? If so, it's best to stay away from it until the dust settles and new security measures have been put in place.
For more information on how you can manage the trusted apps on your ELLI wallet, you can consult this guide link.
Conclusion
In conclusion, connecting to decentralized apps through digital wallets is a crucial feature for non-custodial wallet users.
However, it is important to exercise caution and take necessary precautions before connecting to an app. It is essential to verify the legitimacy of the app by checking the correct URL, documentation, and public social media pages.
Interacting with apps safely is also critical, as signing messages to confirm transactions on the blockchain can not be reversed.
Therefore, granting an app permission to access your funds must be done with due diligence. Checking for an active website or social media presence, reputable people connected to the project, community help channels, and responsiveness to users' inquiries are some measures to ensure app safety.
By taking these precautions, users can enjoy the benefits of decentralized apps while minimizing the risk of scams and hacks.
How to disconnect from apps and websites on the ELLI wallet
If you need to disconnect your ELLI Wallet from any site or app you’ve already connected it to, here is the way to do it.
Note: Keep in mind that disconnecting from a particular app or site, will only stop that dApp from viewing your wallet address, and tokens, and initiating new transactions. Previously approved token transfers and recurring transactions will not be stopped by doing this.
Let's cover in a step-by-step guide the process of disconnecting from trusted apps on the browser extension.
Step 1
- Open your ELLI extension click on the Settings tab on the bottom right and select Security and Privacy.
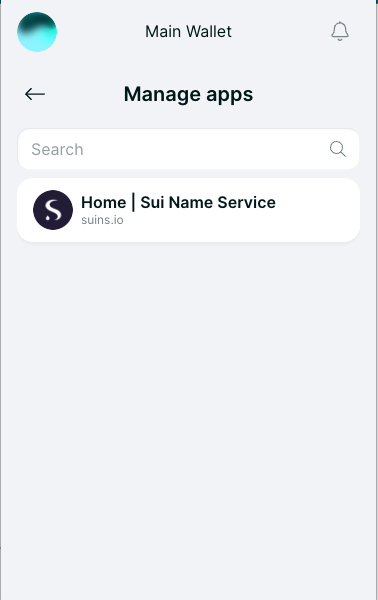
- Click Manage Apps.
Step 2
- You are presented with a list of your trusted apps.
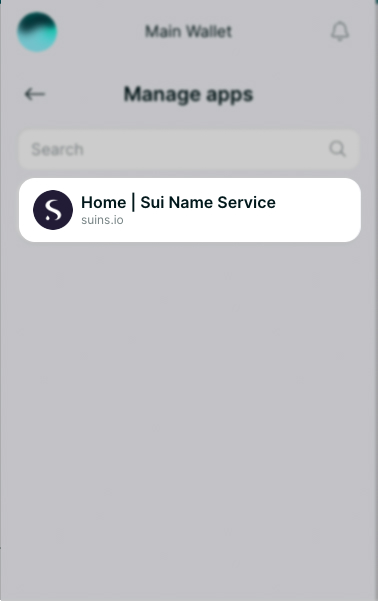
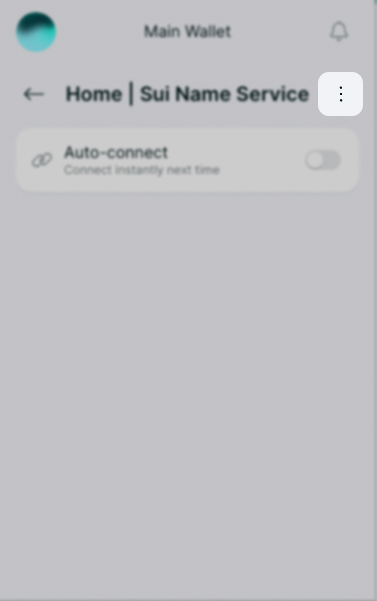
- Click on the three vertical dots of the app you would like to disconnect from and click Delete.
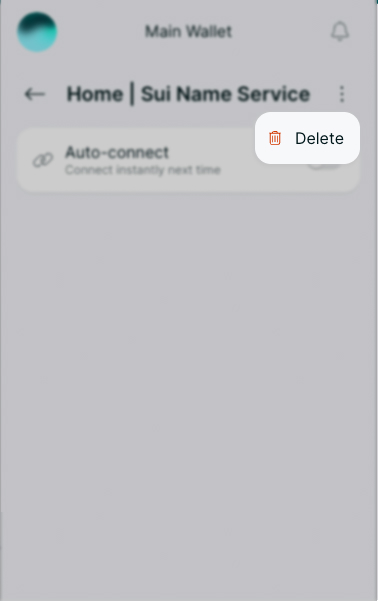
- Confirm your action by clicking on Yes.

You're All Set
Well, that was easy.